Assembly Guide - Vpin Cabinet (Premium, Flat-pack)
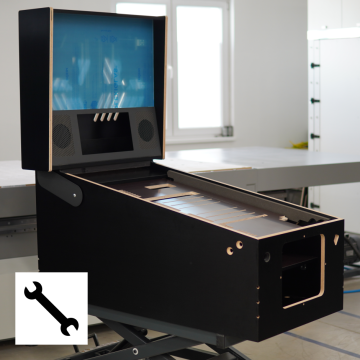
This guide will walk you step by step through the installation of your new VPin cabinet. Note: Most images in the manual depict the cabinet in the Widebody version. If some assembly procedures differ for the Ultra-Widebody cabinet, the procedure for those steps is shown separately.
The guide is divided into the following chapters:
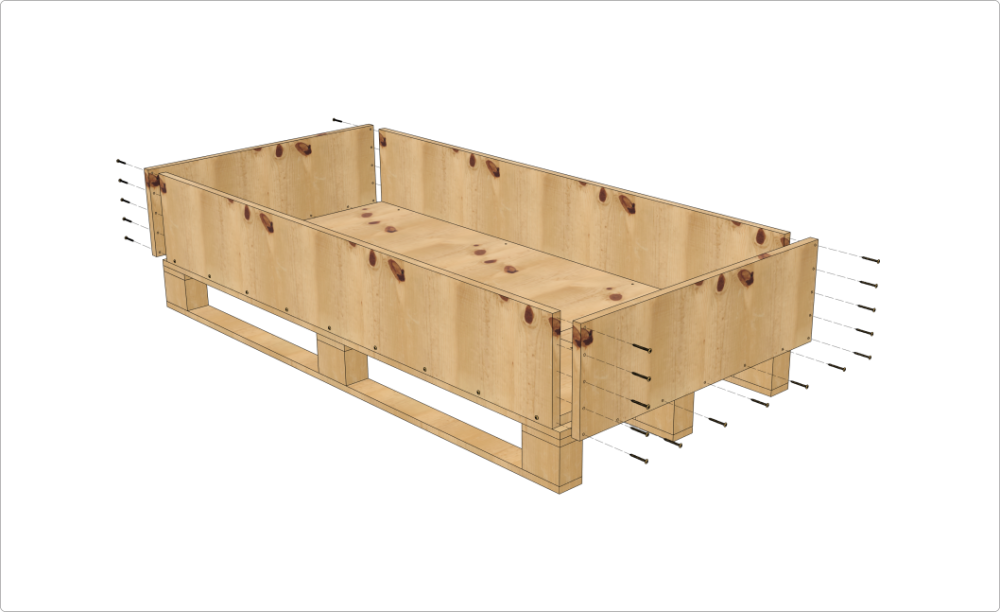
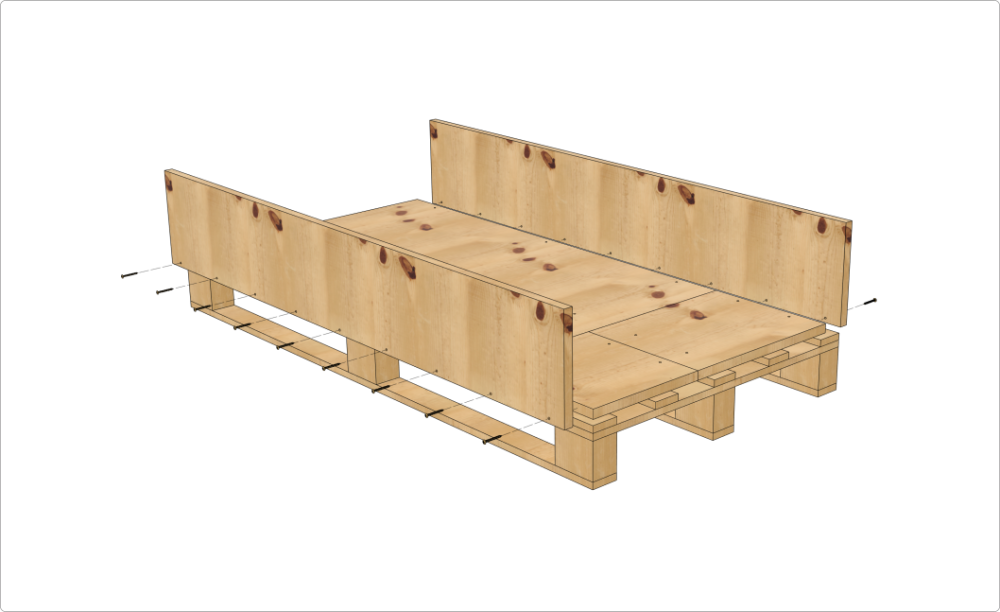
1. Disassembling the shipping crate
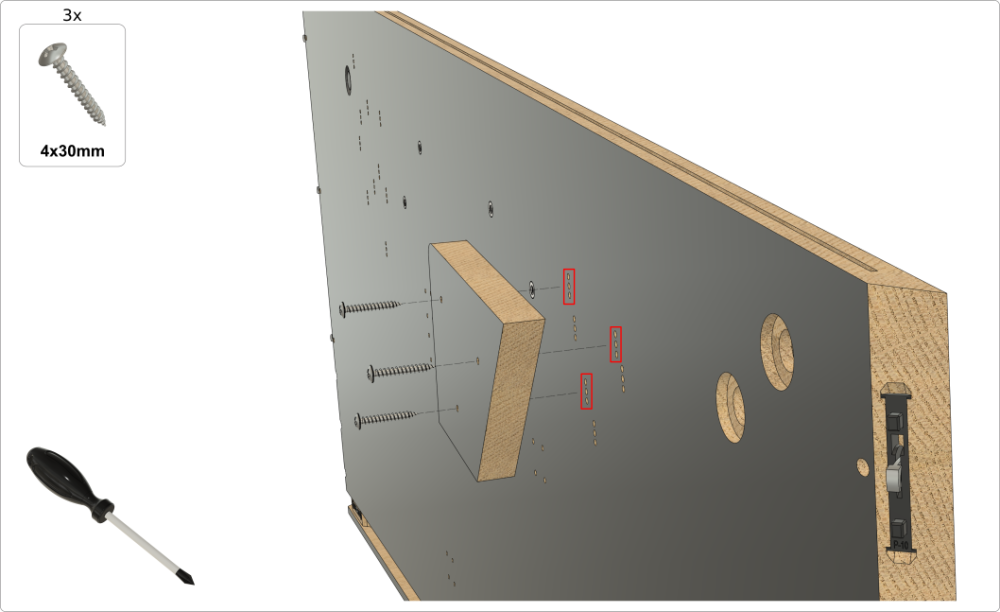
2. Assembling the main cabinet body
3. Assembling the backbox
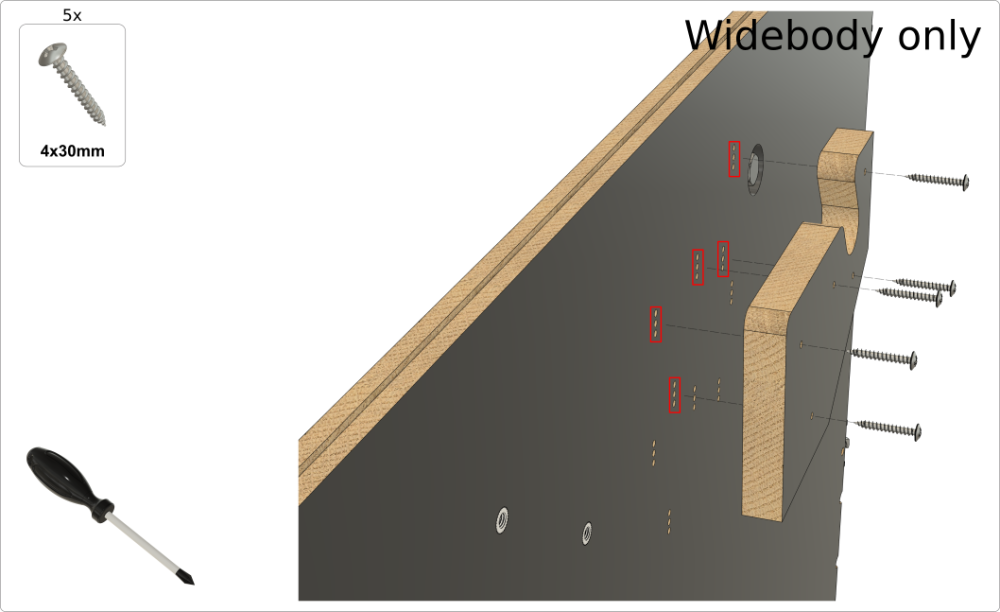
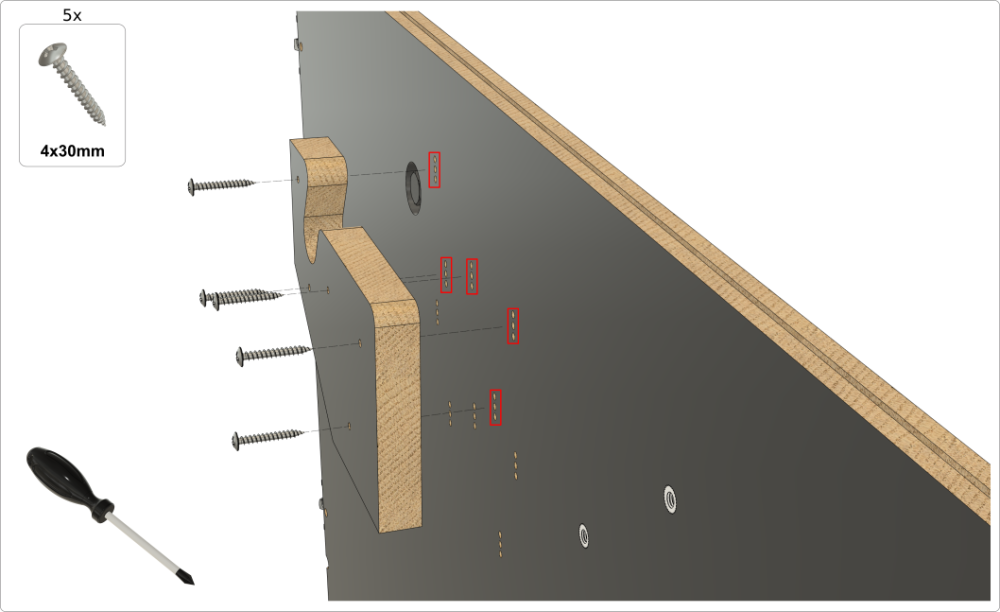
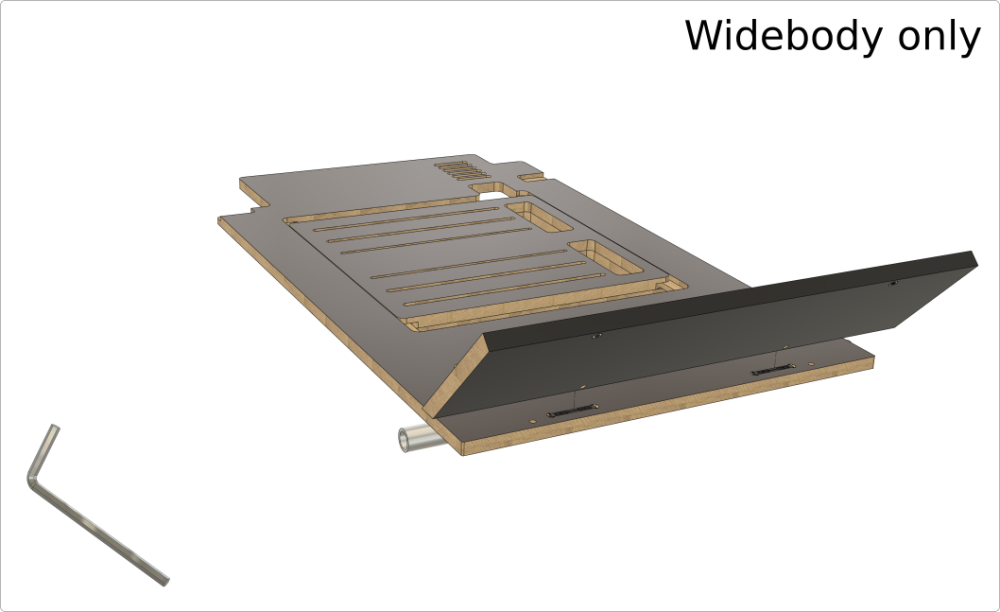
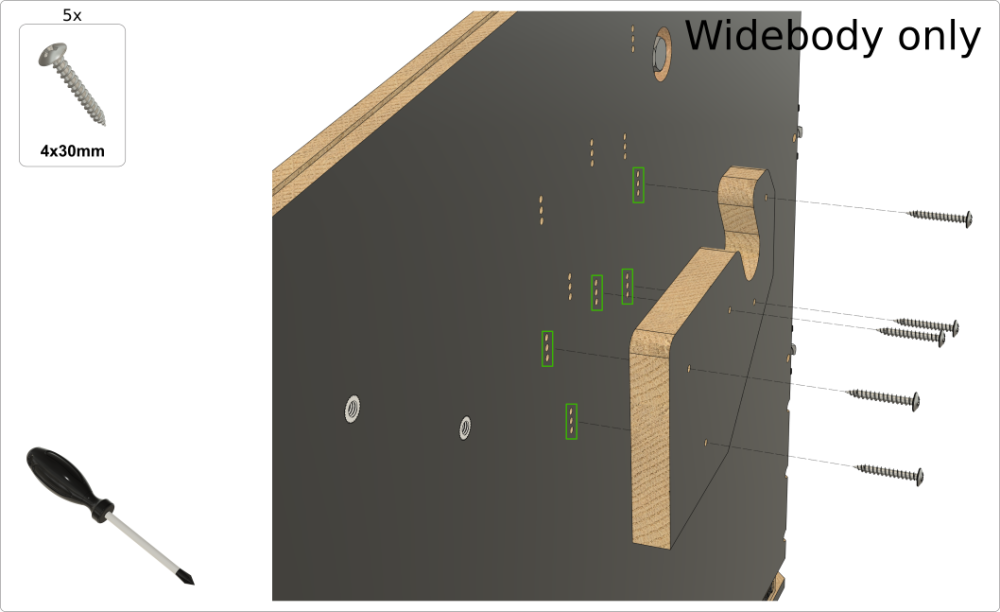
4a. Assembling the playfield monitor holder (Widebody)
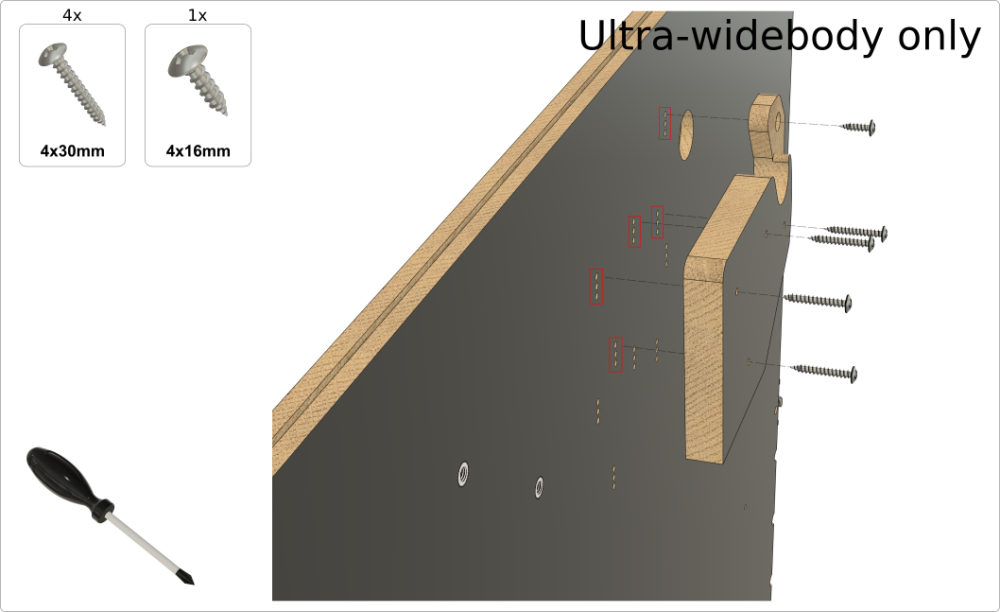
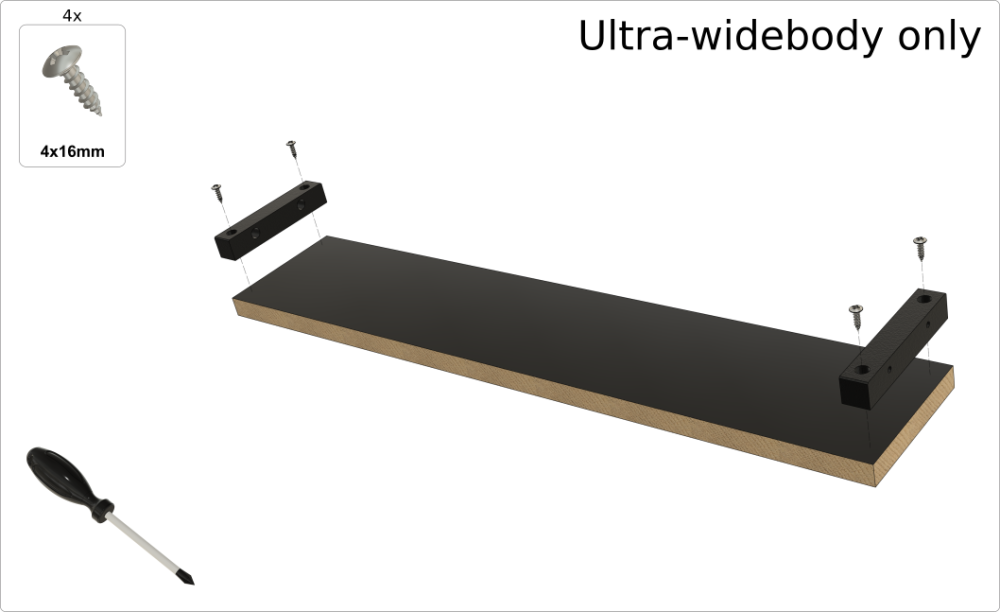
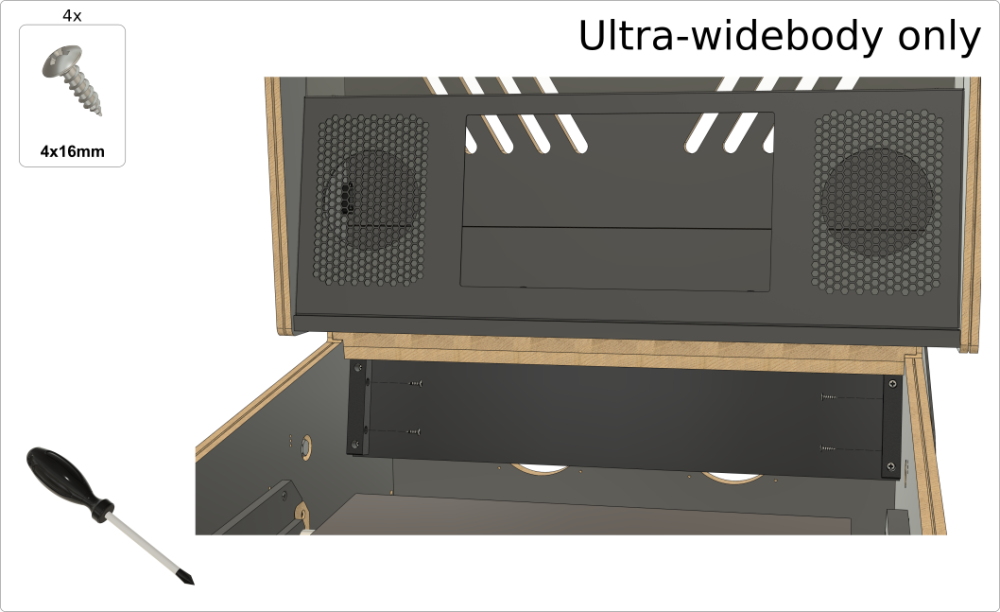
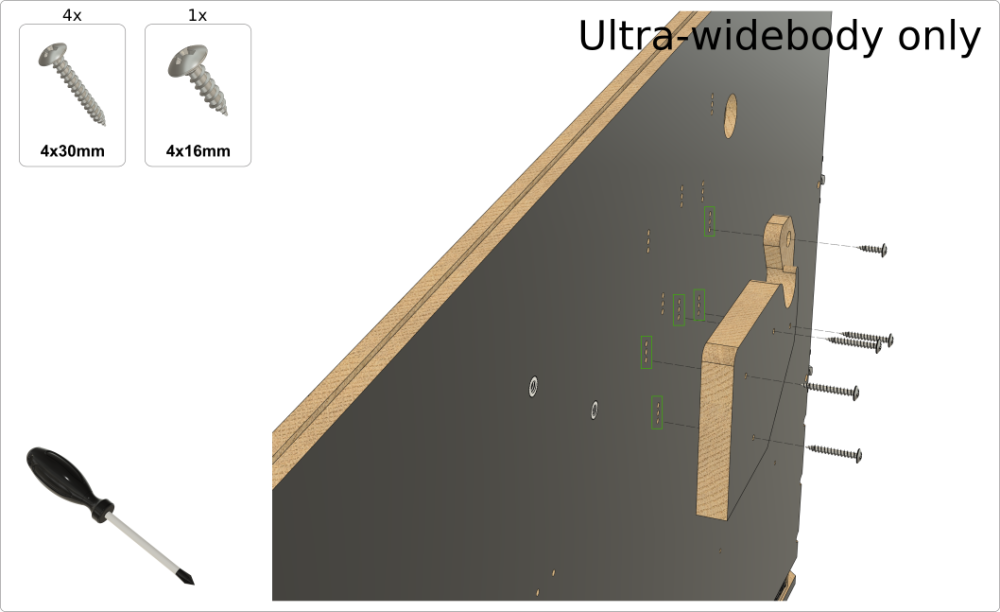
4b. Assembling the playfield monitor holder (Ultra-widebody)
5. Playfield monitor holder – setting it parallel to the glass position
6. Playfield monitor holder – setting to the "classic" lowered position
7. Applying Vpin cabinet decals
8. Installing optional TUKKARI siderails
9. Sourcing other cabinet parts
1. Disassembling the shipping crate

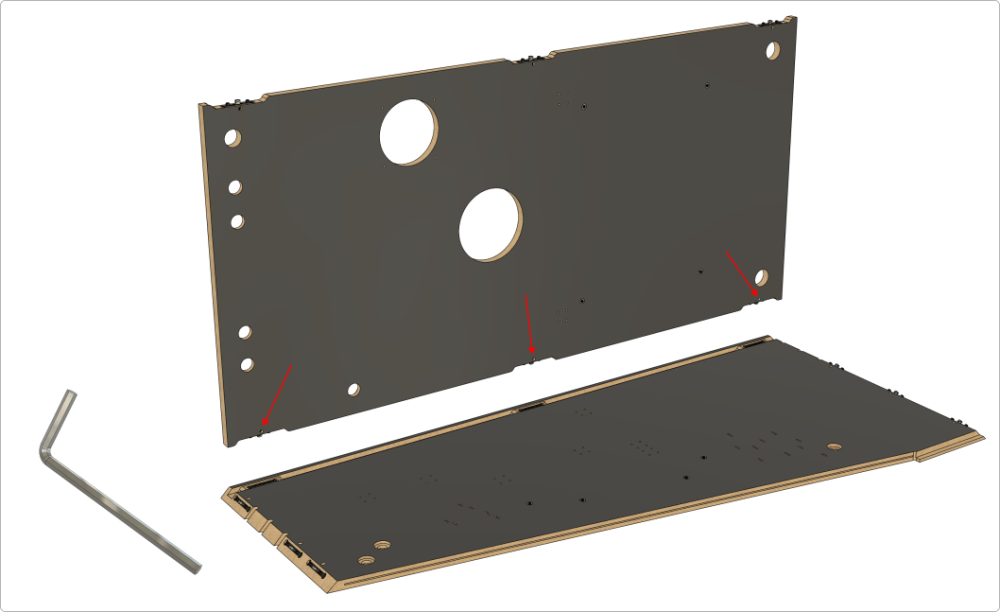
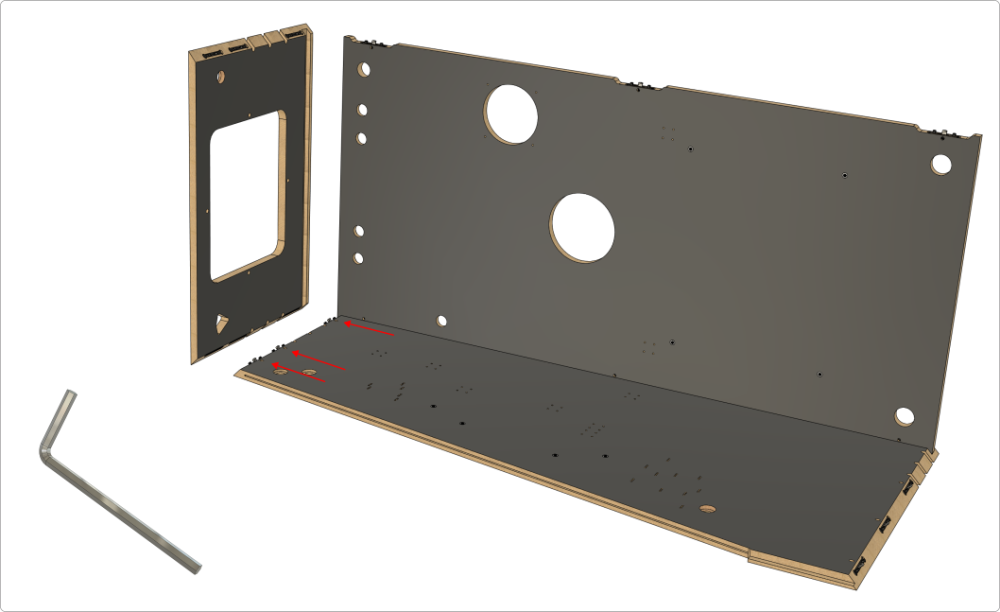
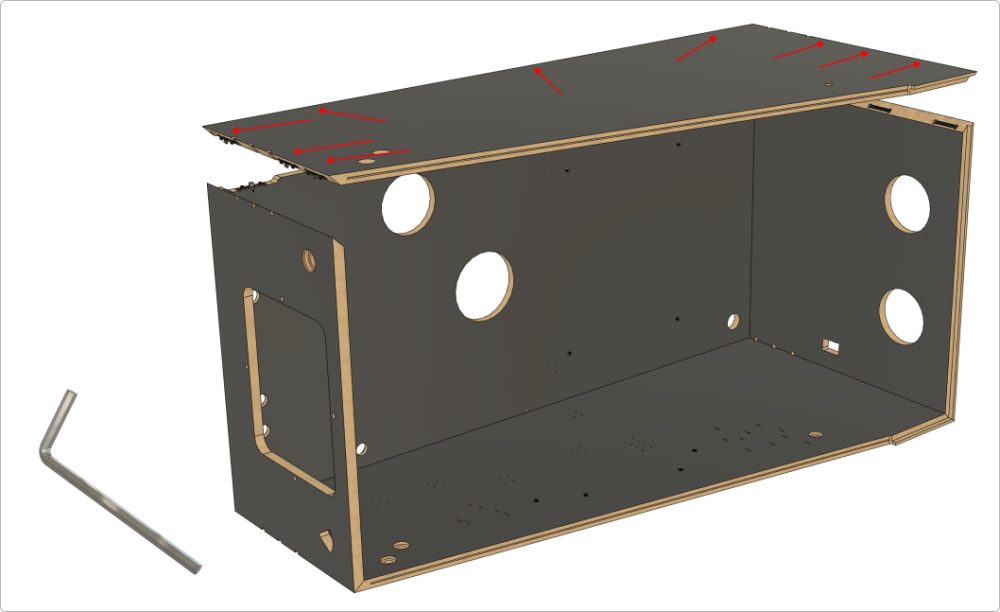
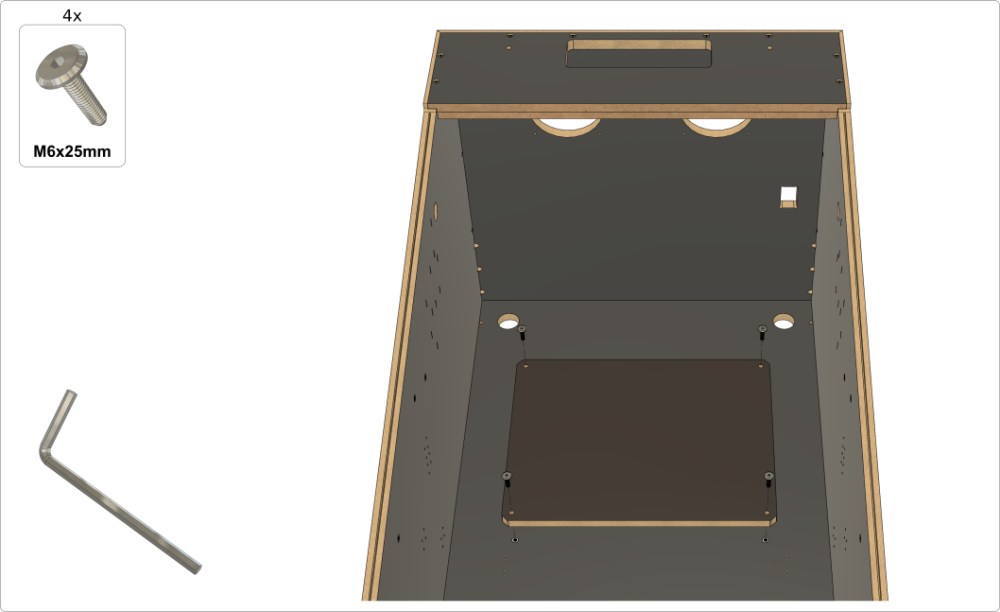
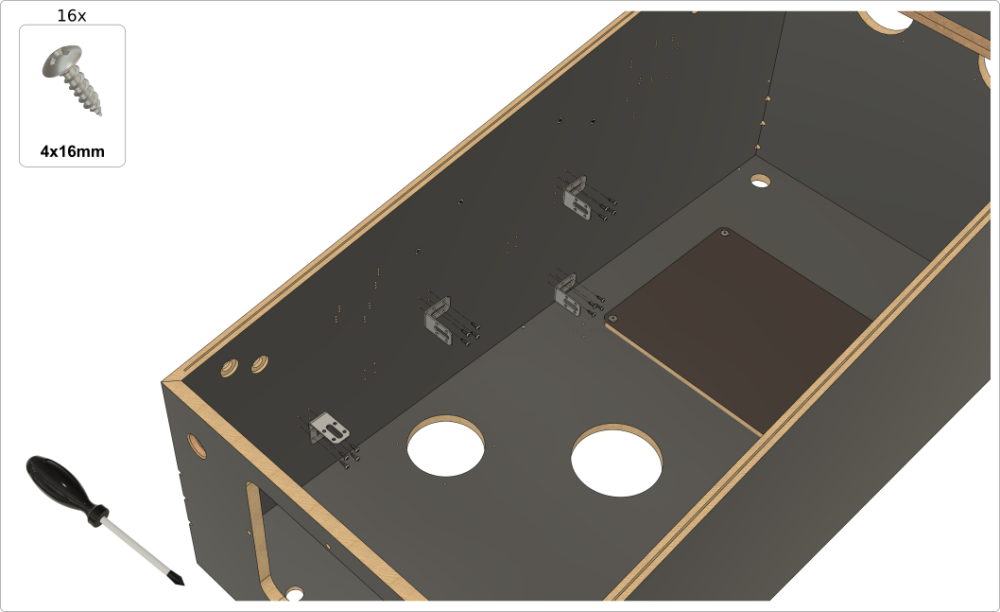
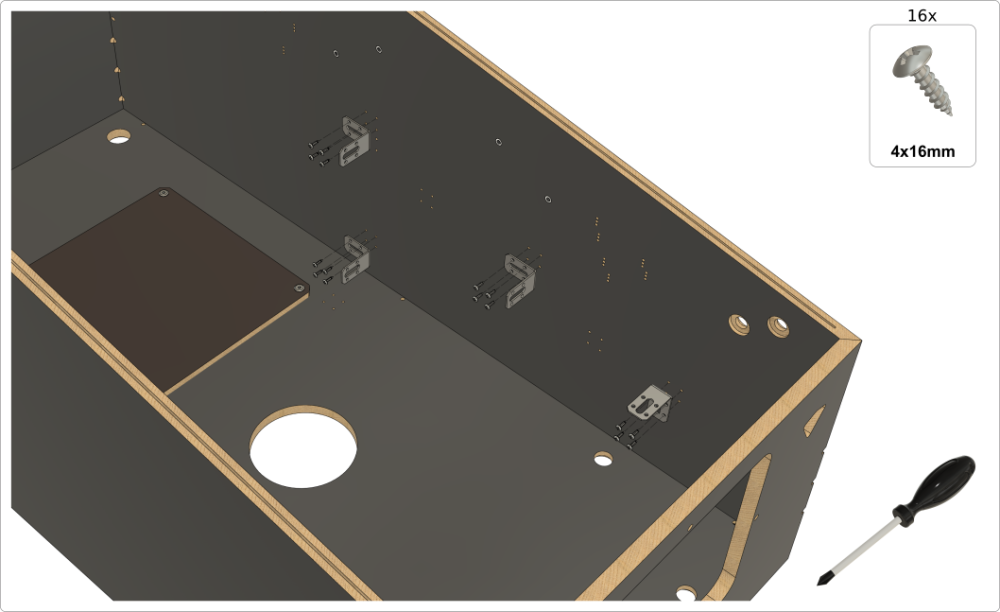
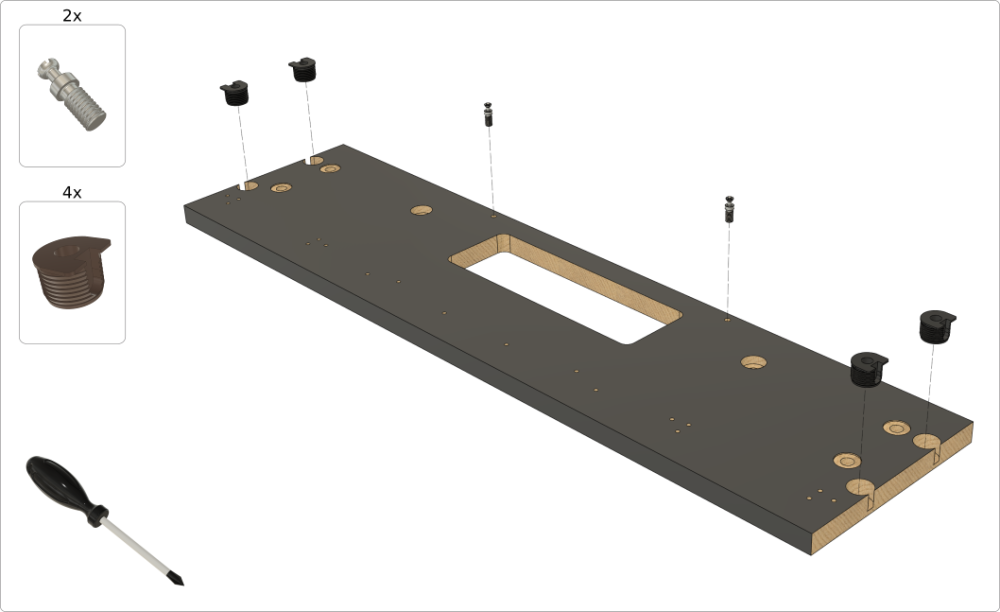
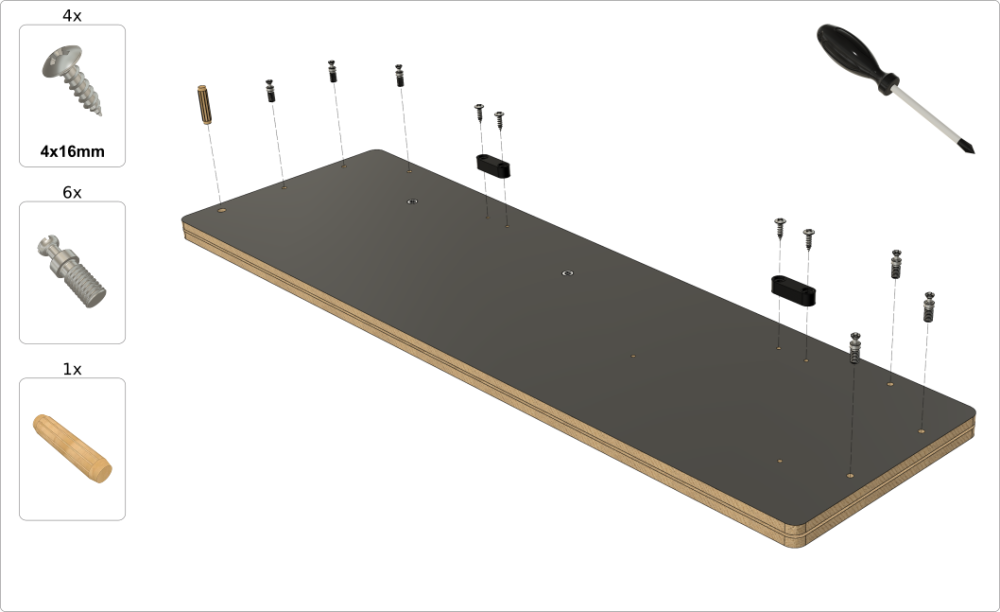
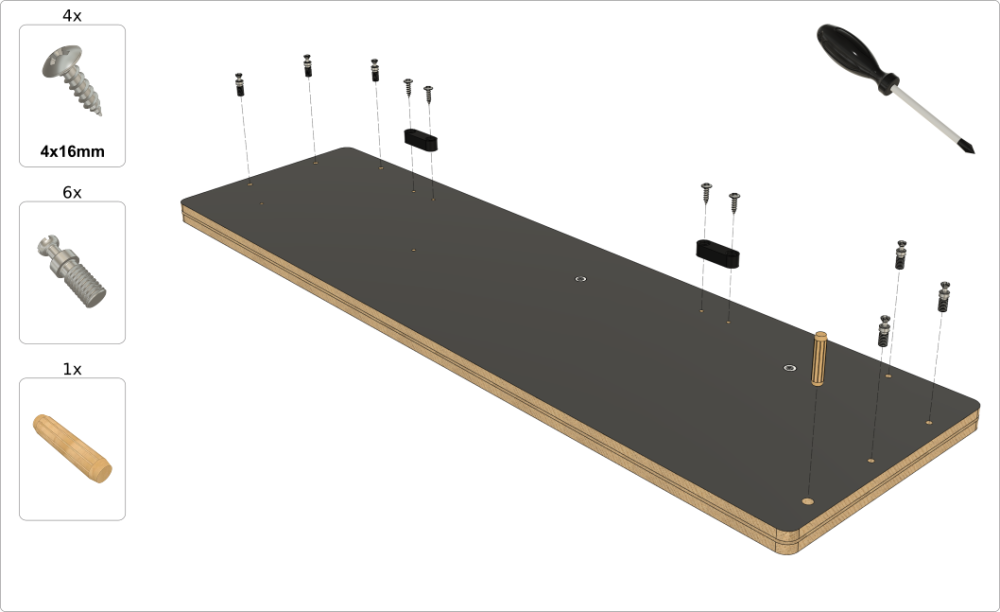
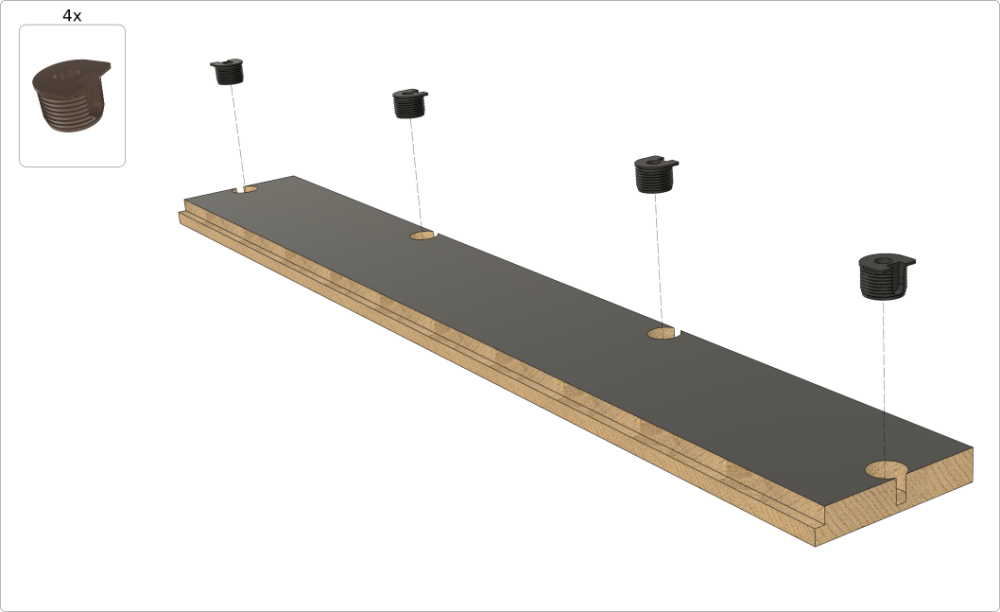
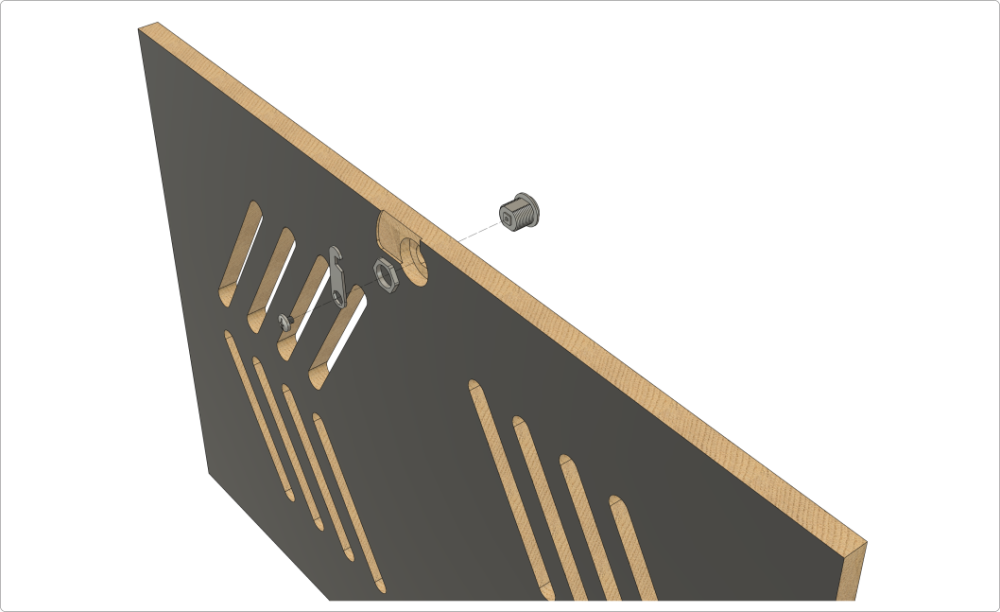
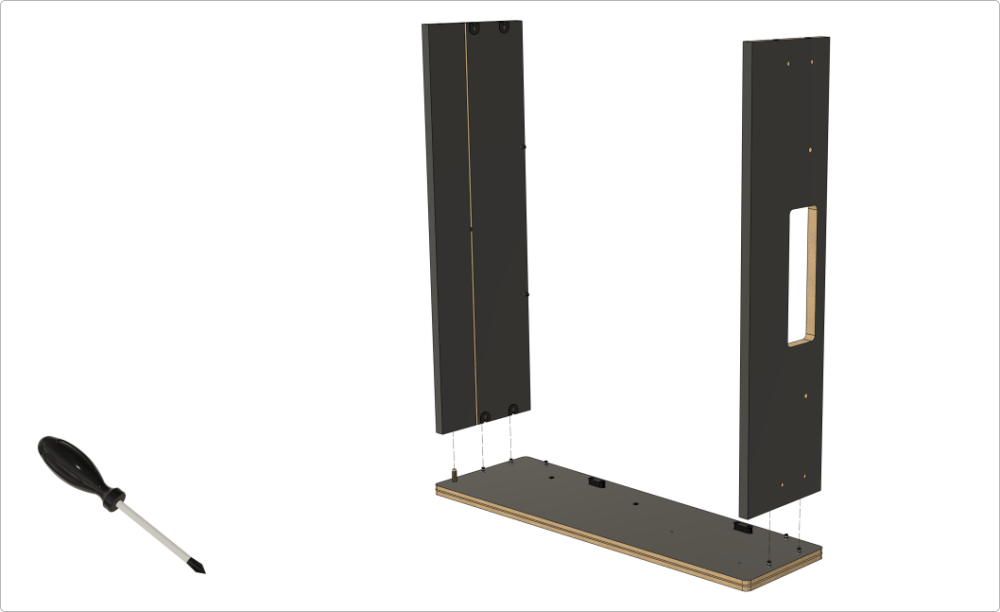
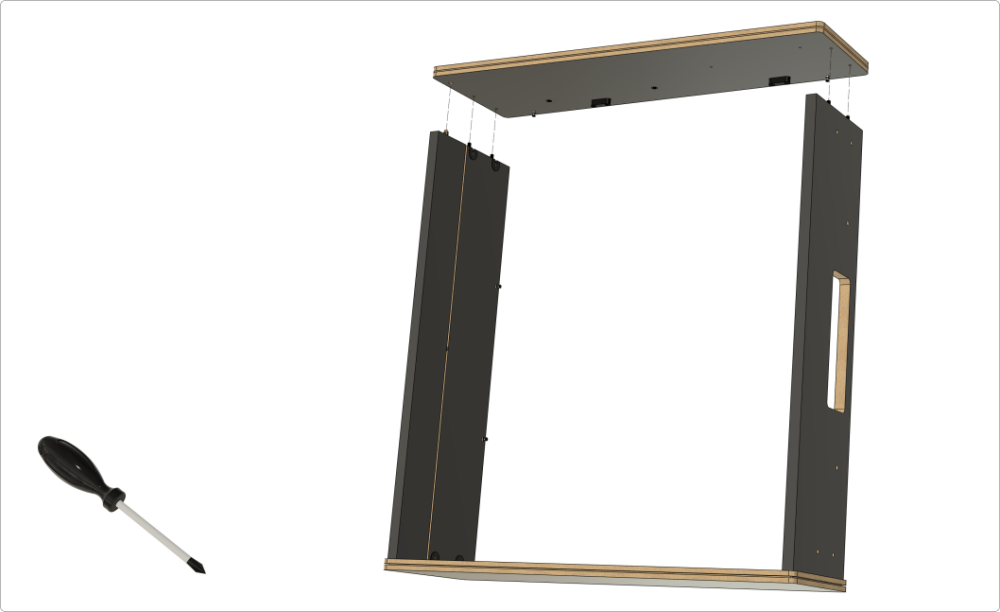
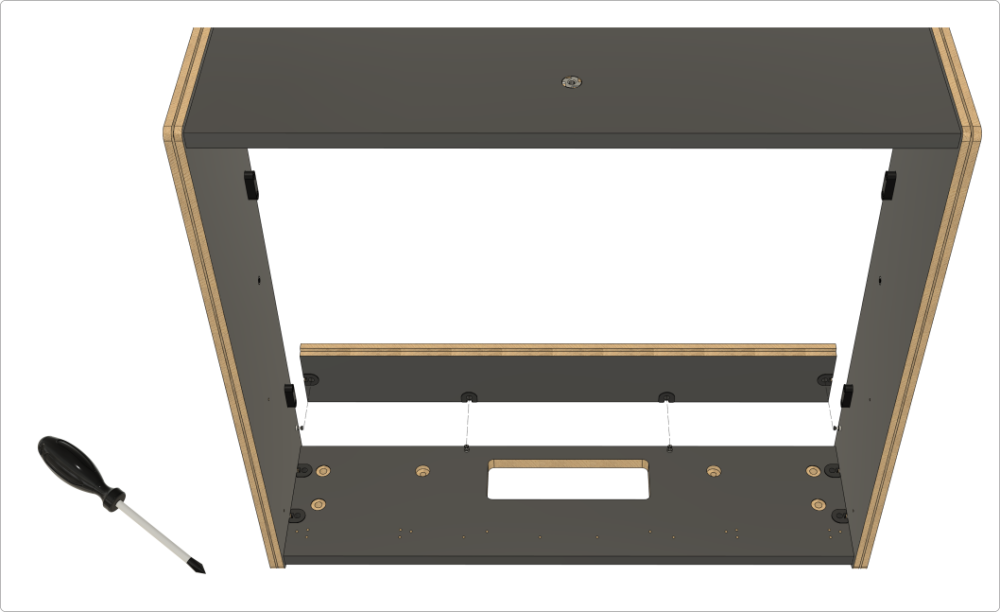
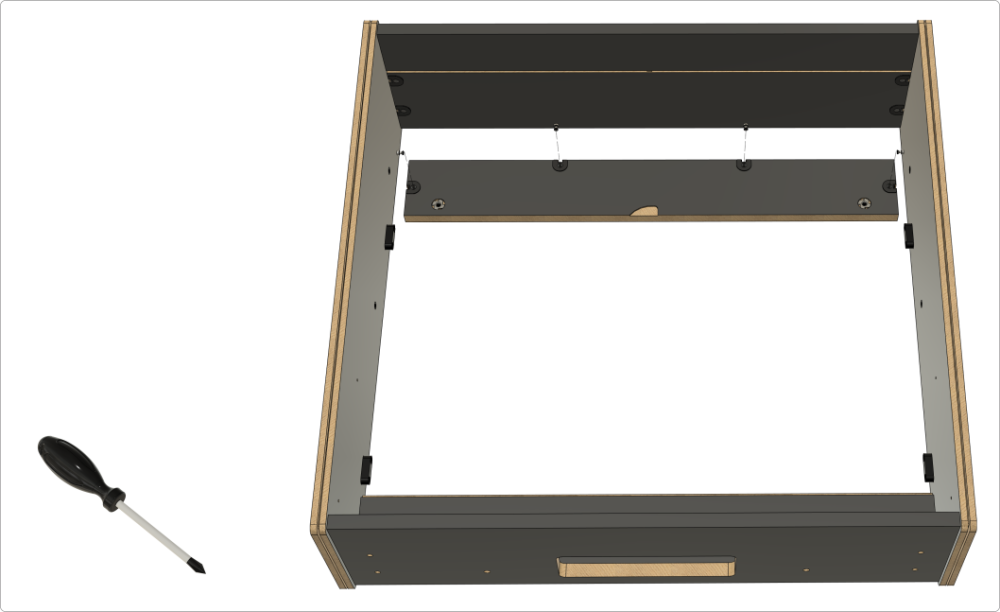
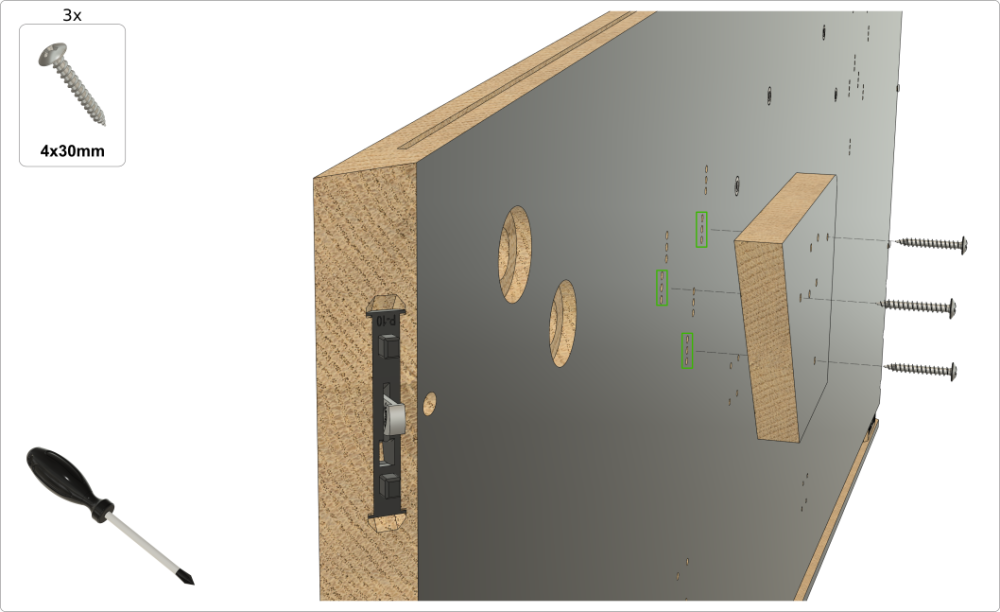
2. Assembling the Main Cabinet Body (Do a dry-fit of all parts before gluing!)
Important: Only the main cabinet body is meant to be glued — the backbox is not designed to be glued. We strongly recommend first assembling the main cabinet body without glue (a dry fit) to fully familiarize yourself with the process and construction. Once you're confident, you can proceed to glue.

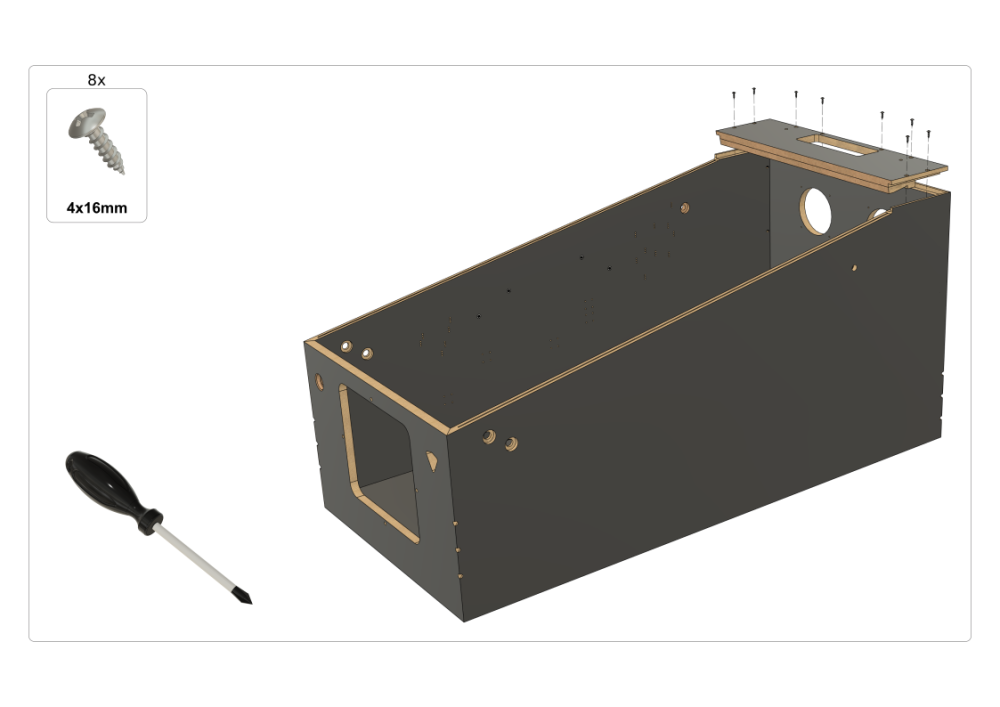
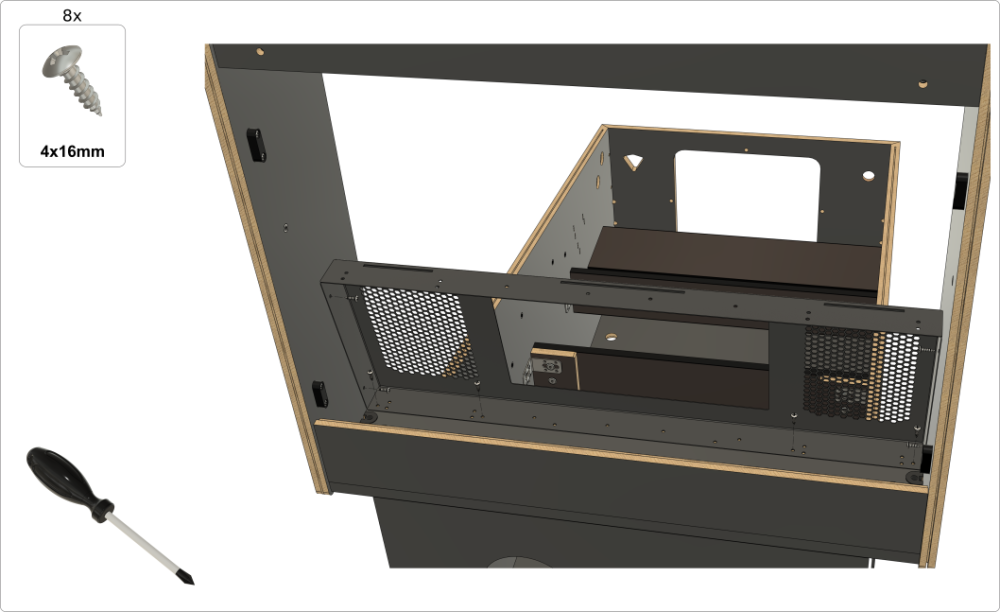
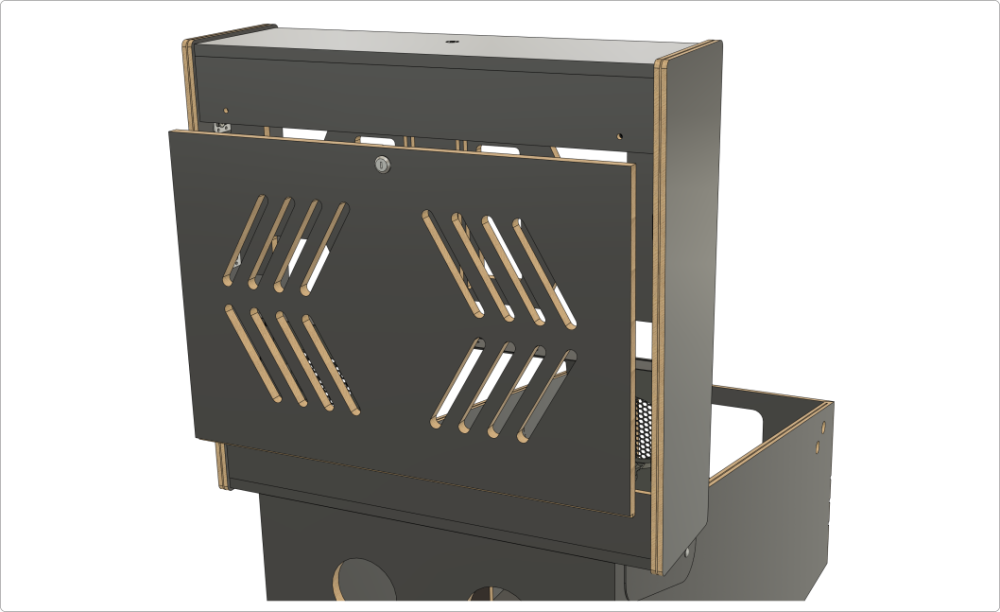
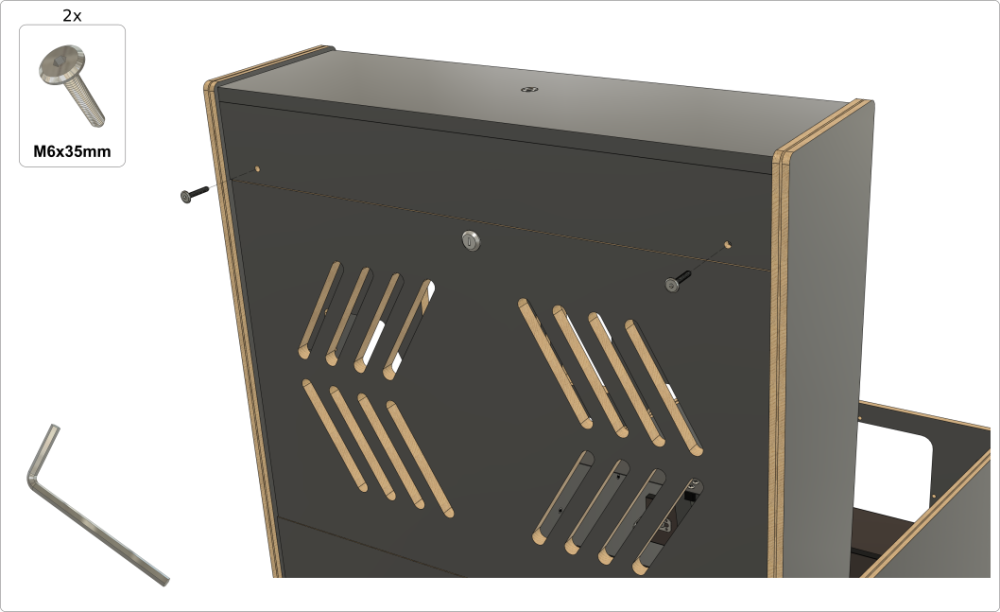
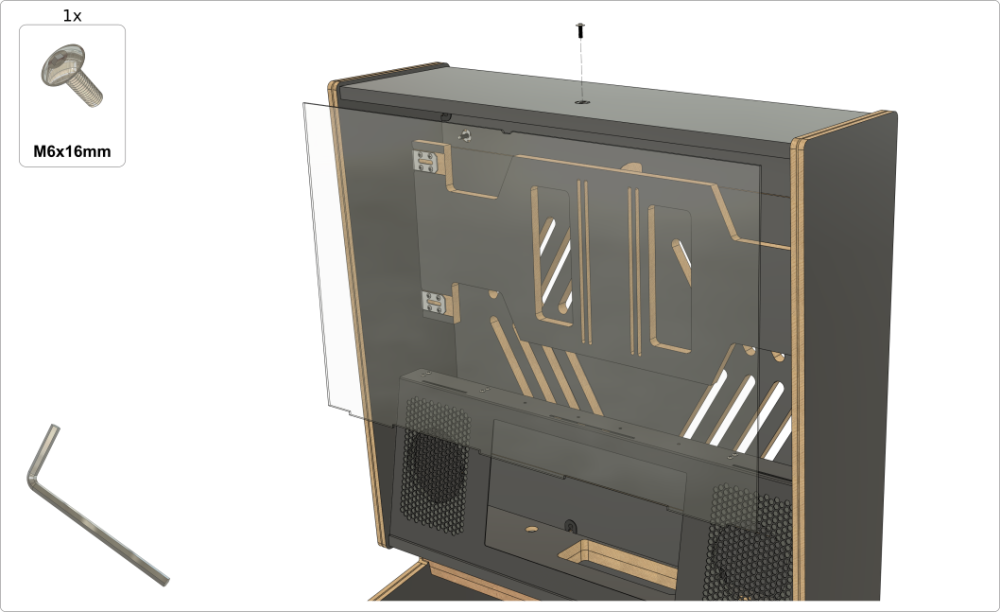
3. Assembling the backbox

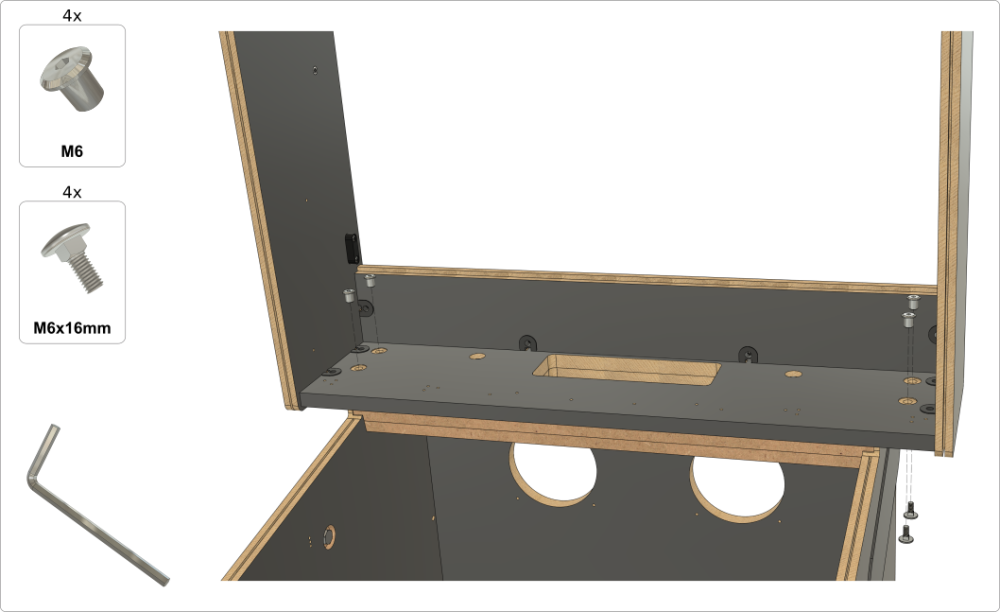
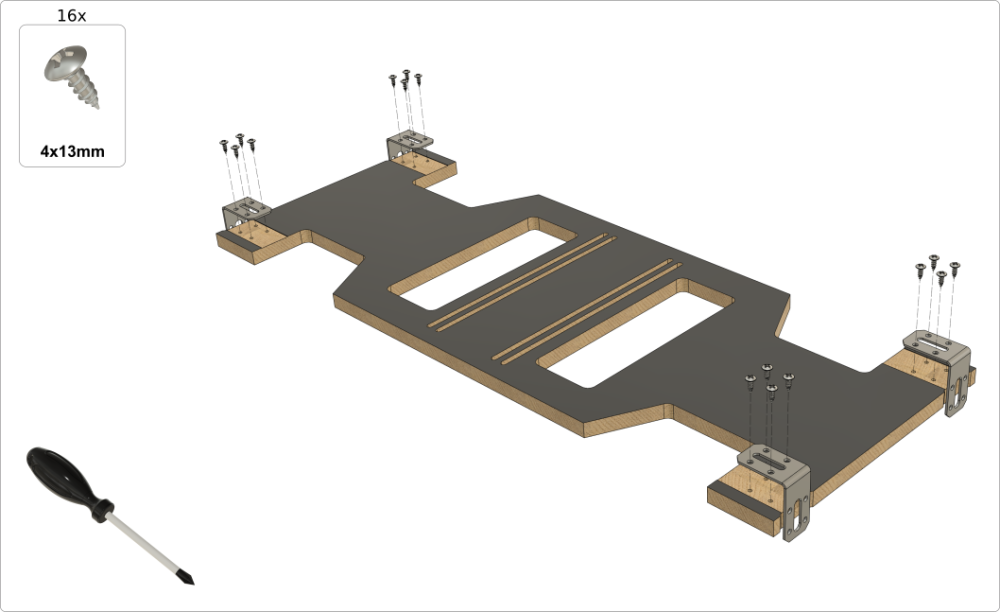
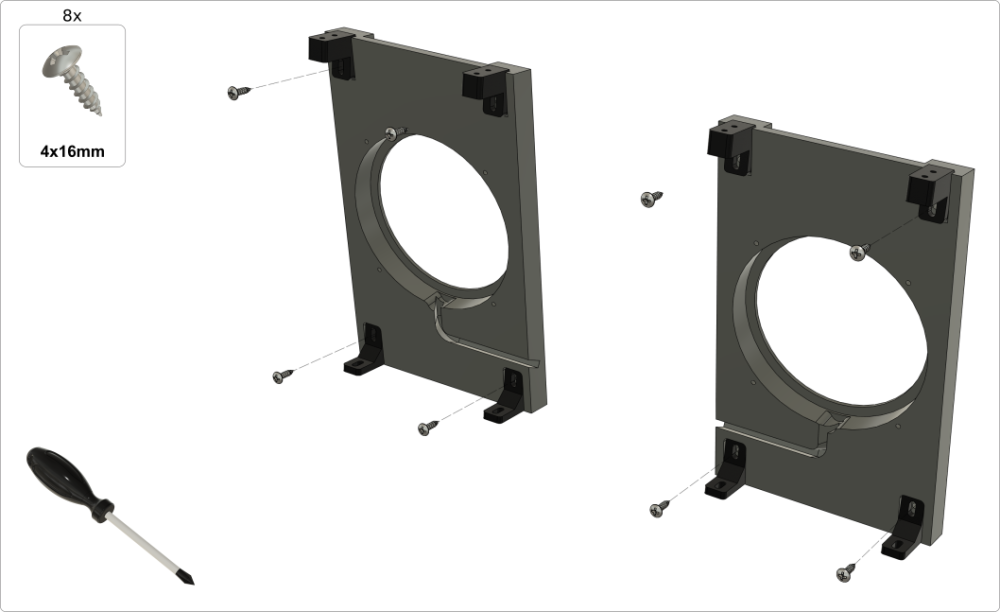
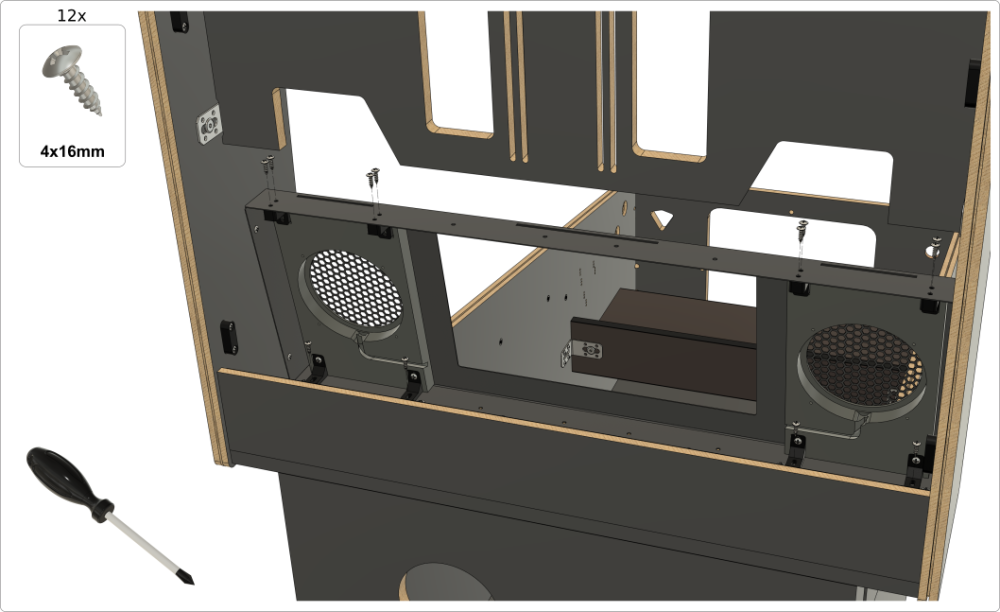
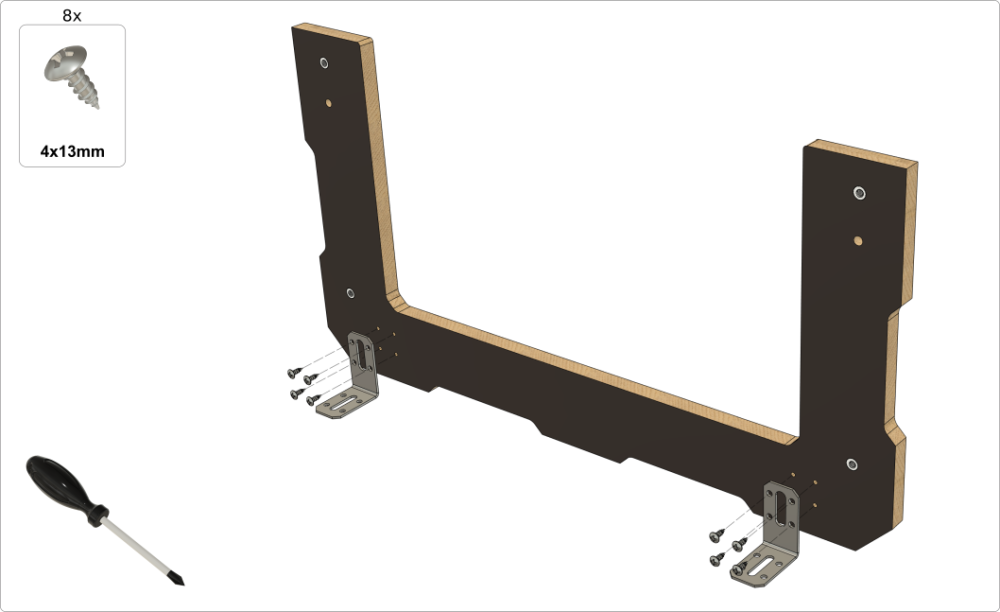
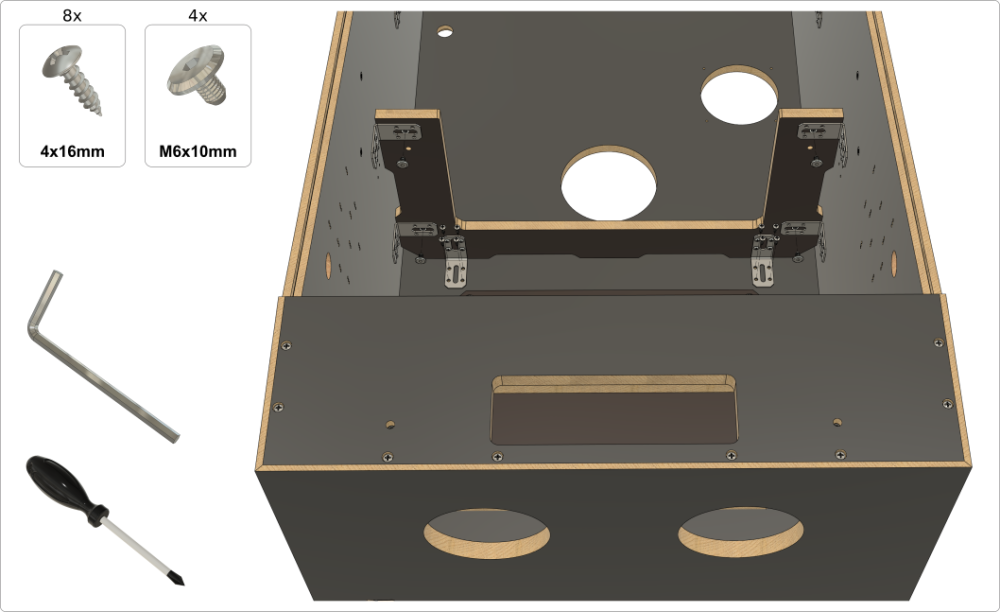
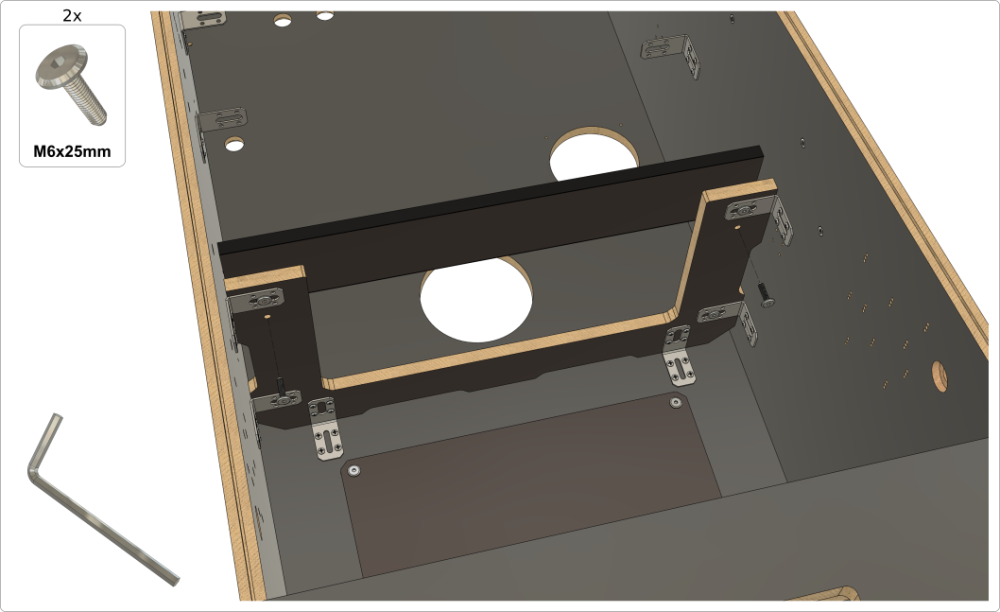
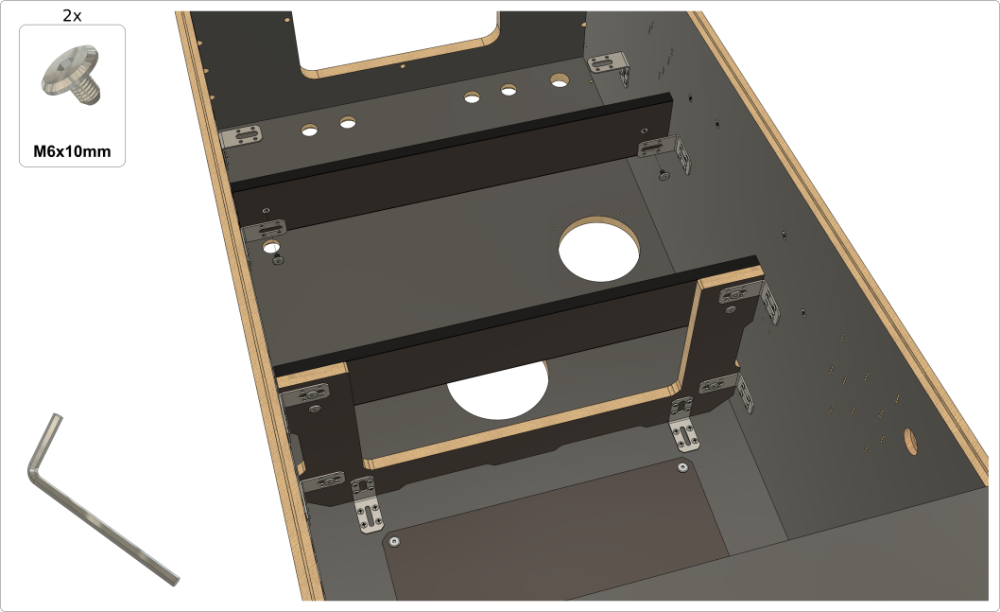
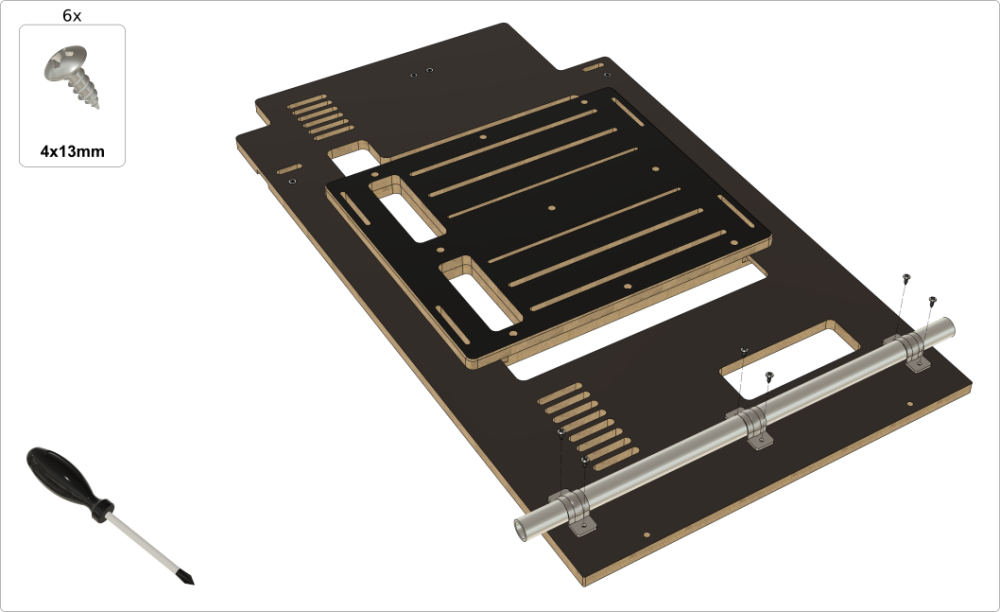
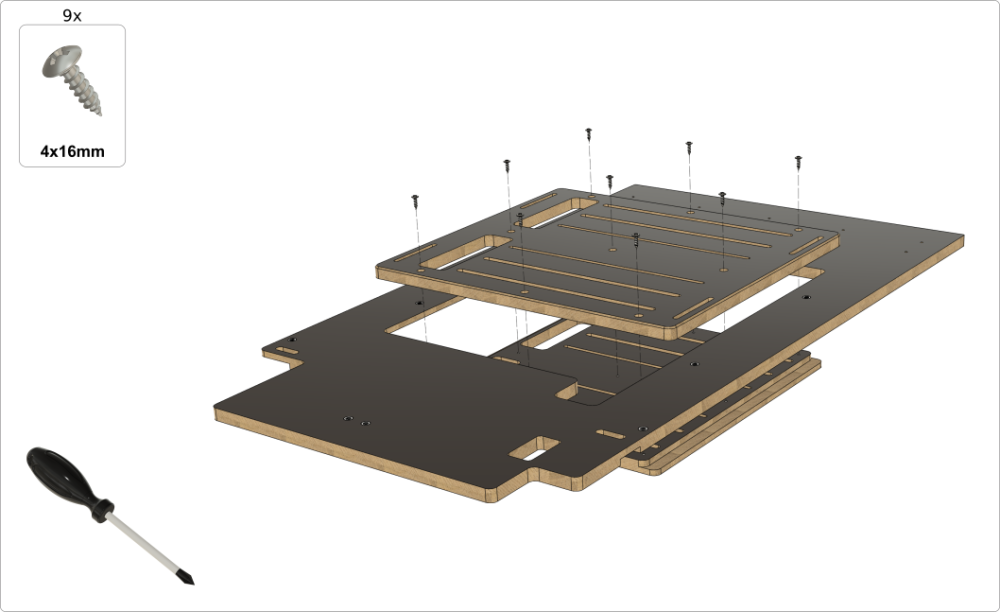
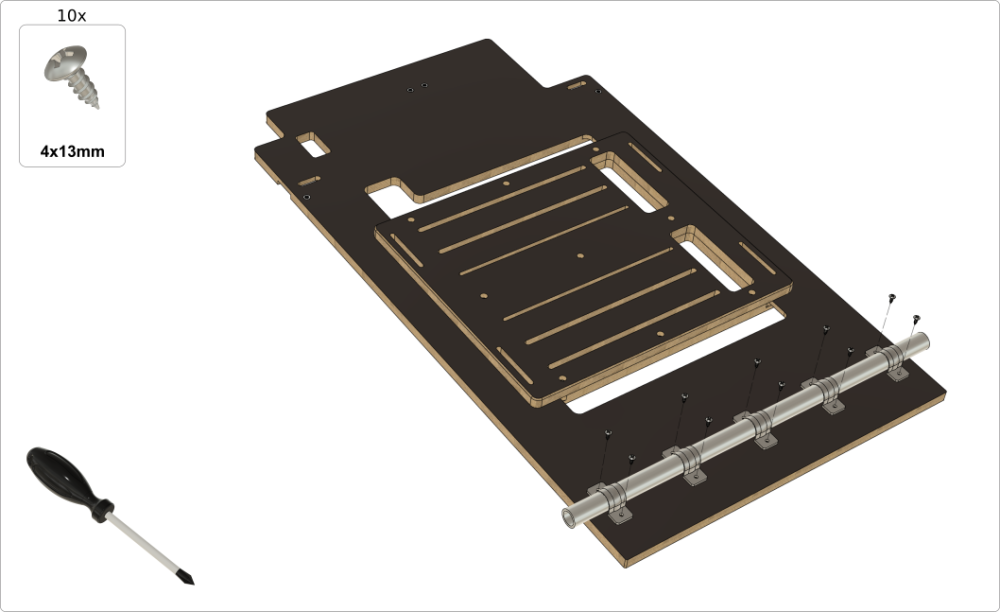
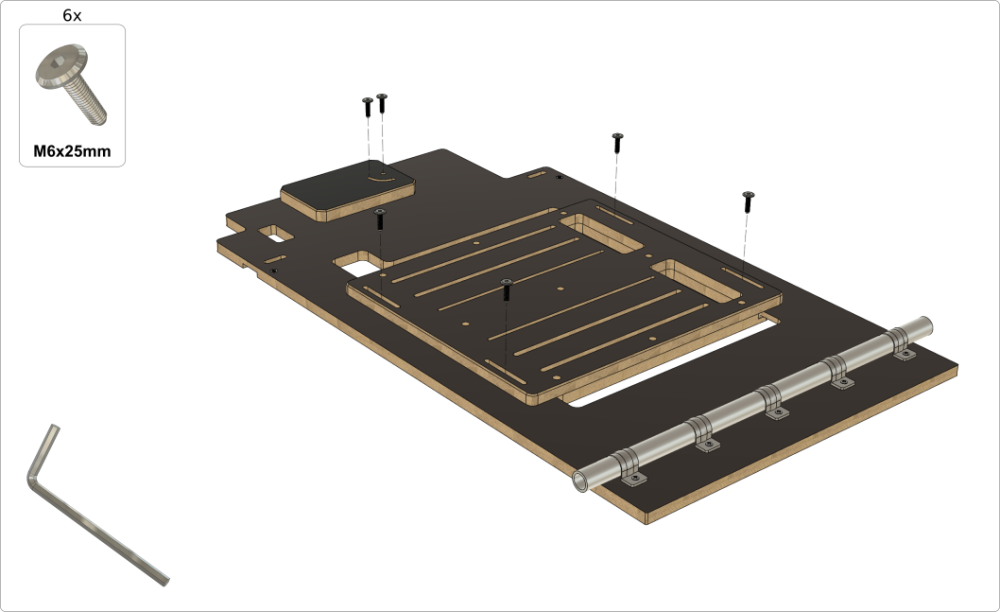
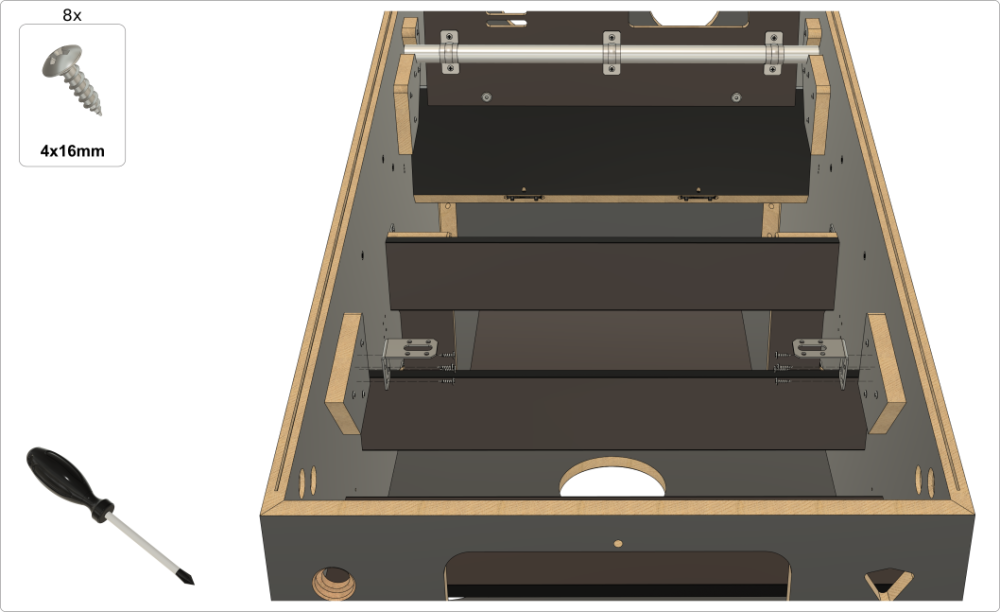
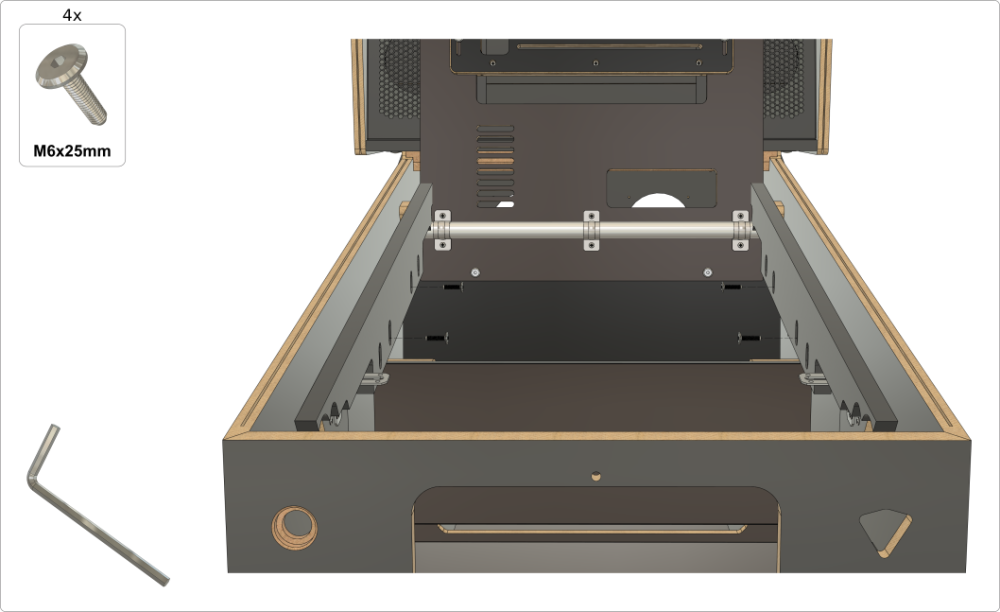
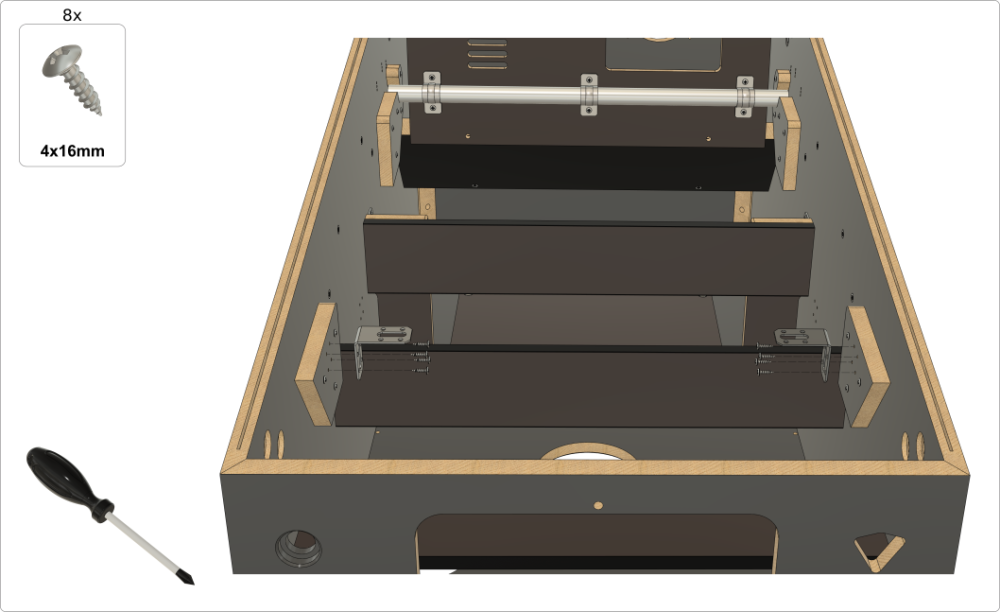
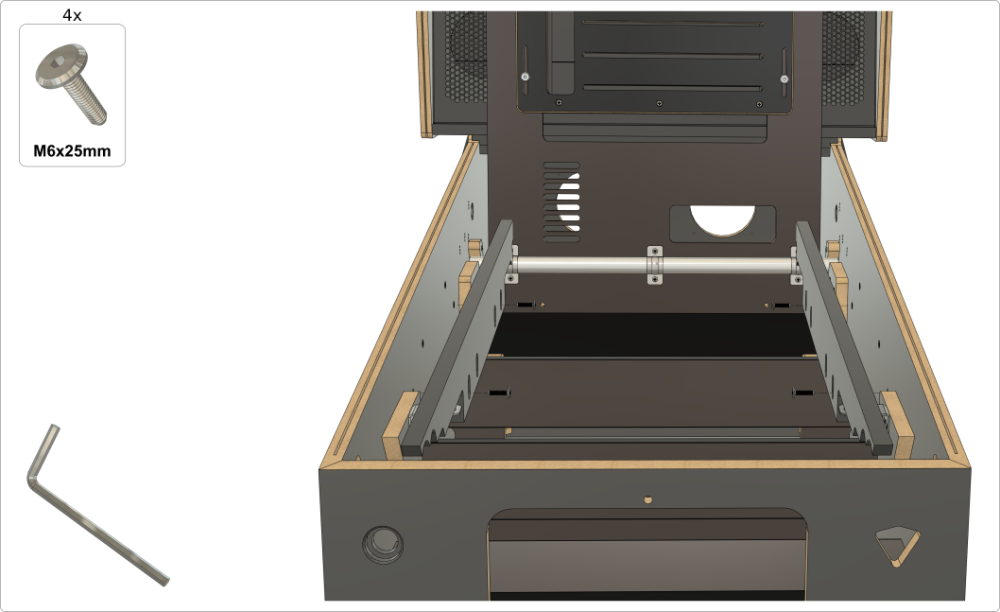
4a. Assembling the playfield monitor holder (Widebody)


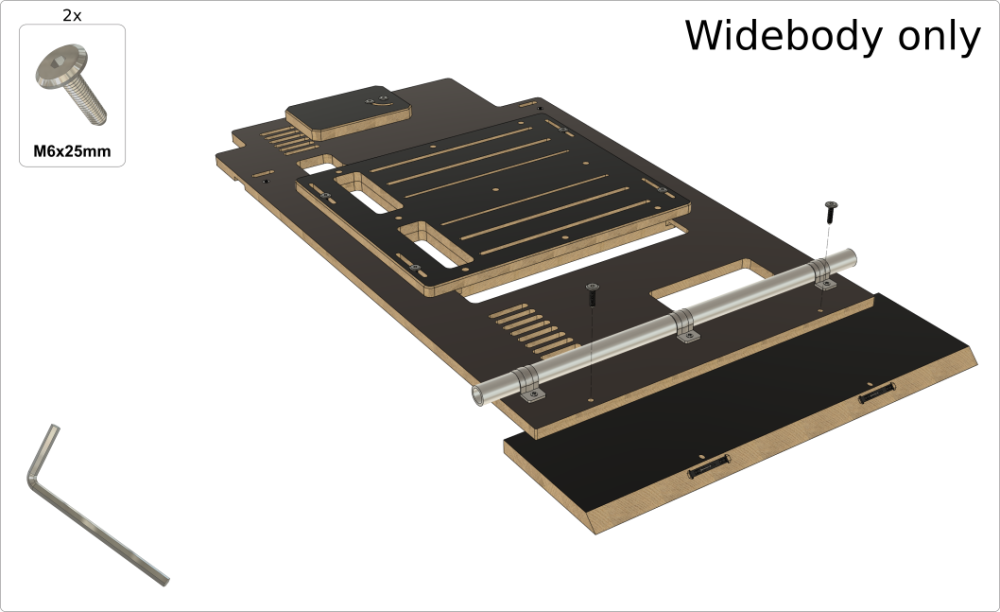
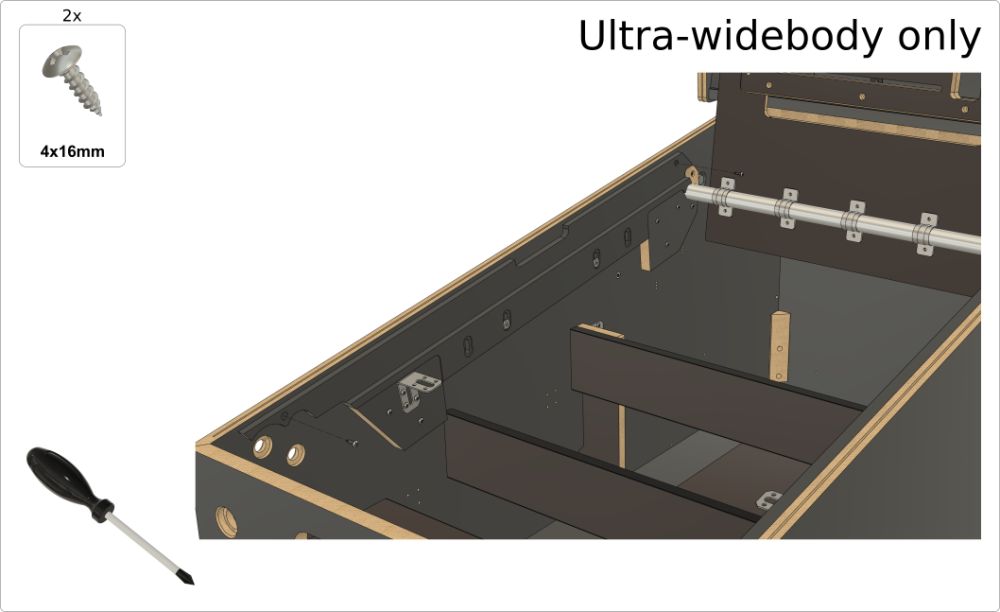
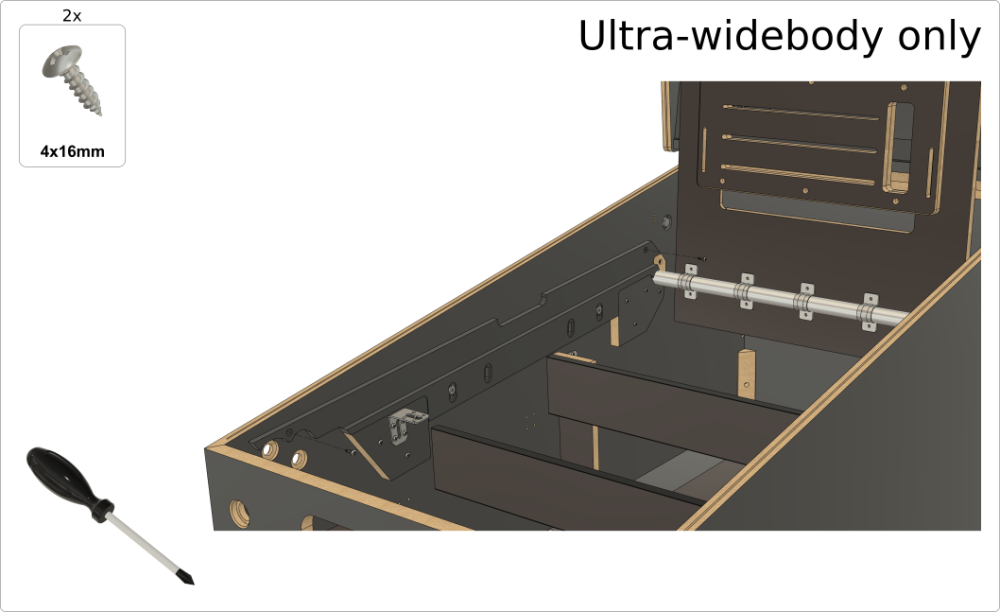
4b. Assembling the playfield monitor holder (Ultra-widebody)
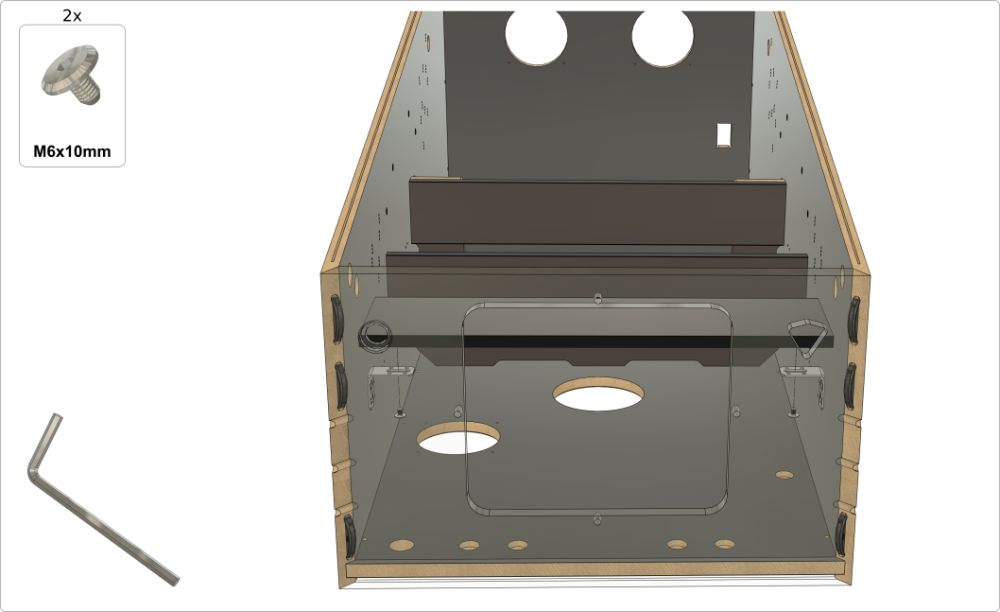
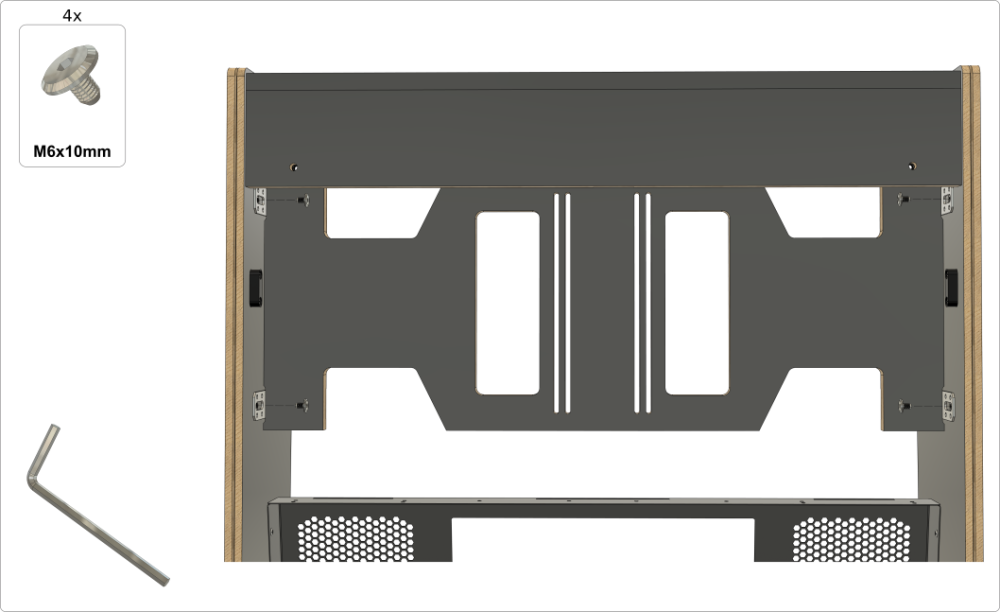
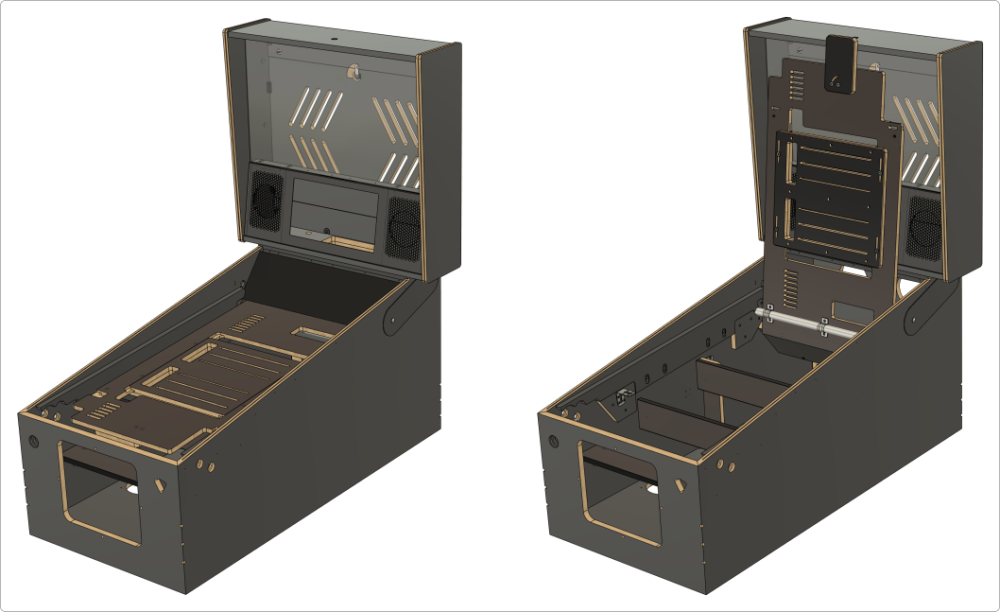
5. Playfield monitor holder – setting it parallel to the glass position
(Skip this chapter if you plan to set the holder in the "classic" lowered position.)
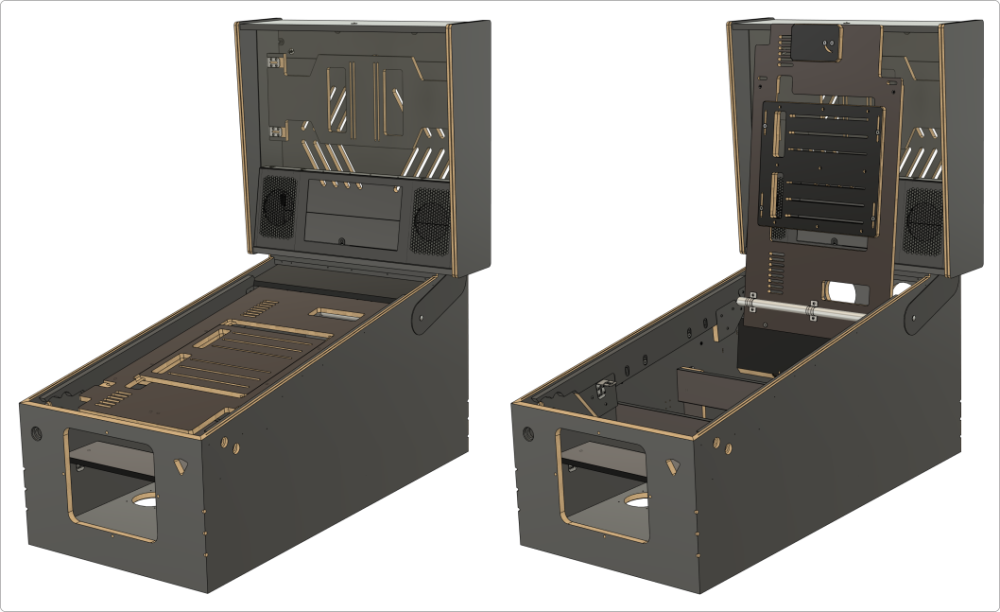
6. Playfield monitor holder – setting to the "classic" lowered position
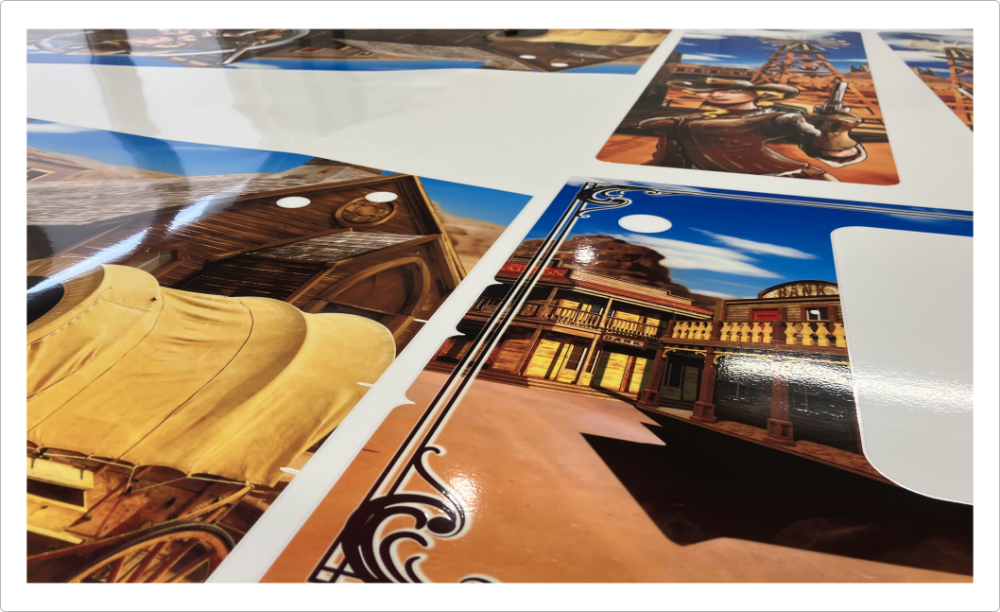
7. Applying pinball cabinet decals
Check our Decal Printing Service page for detailed information on how to apply your decals.
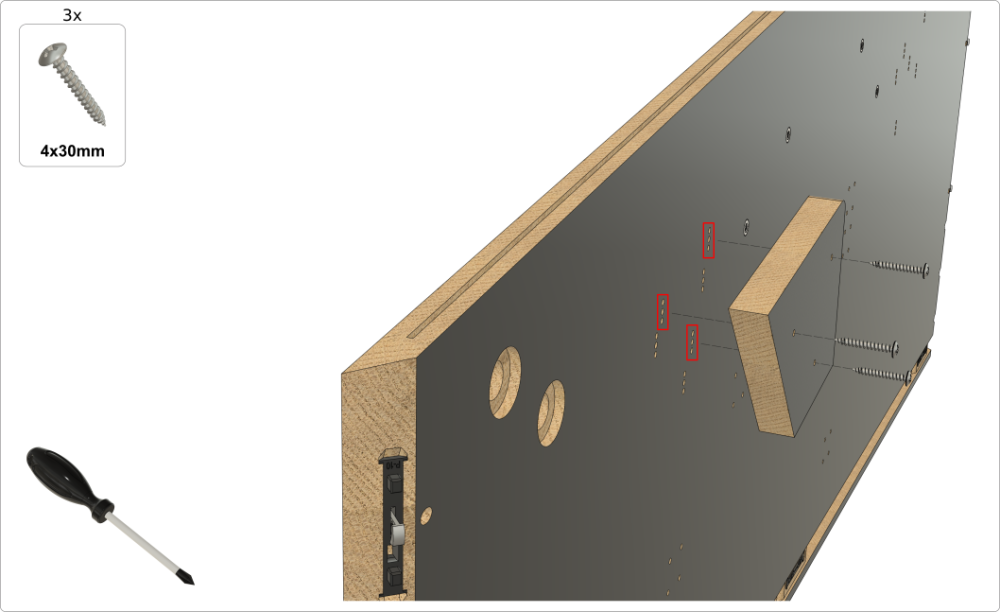
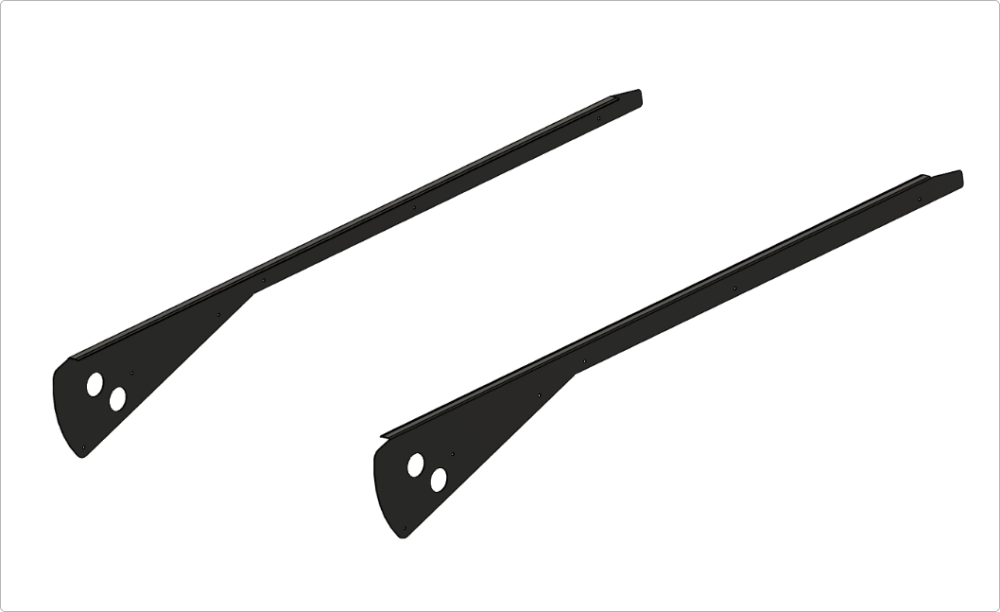
8. Installing optional TUKKARI siderails
If you purchased the optional TUKKARI siderails with your VPin cabinet, follow the installation steps below.
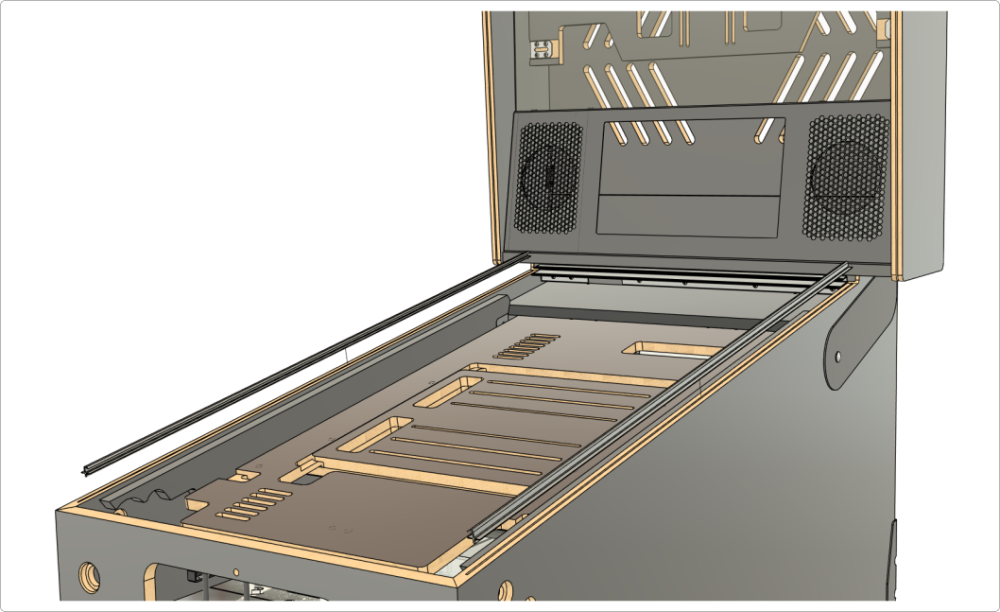
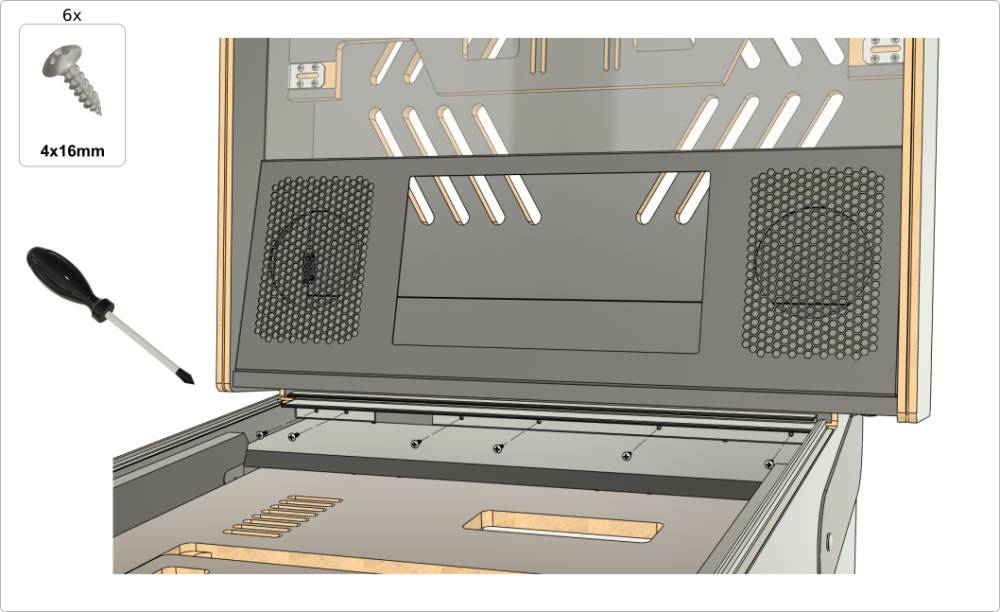
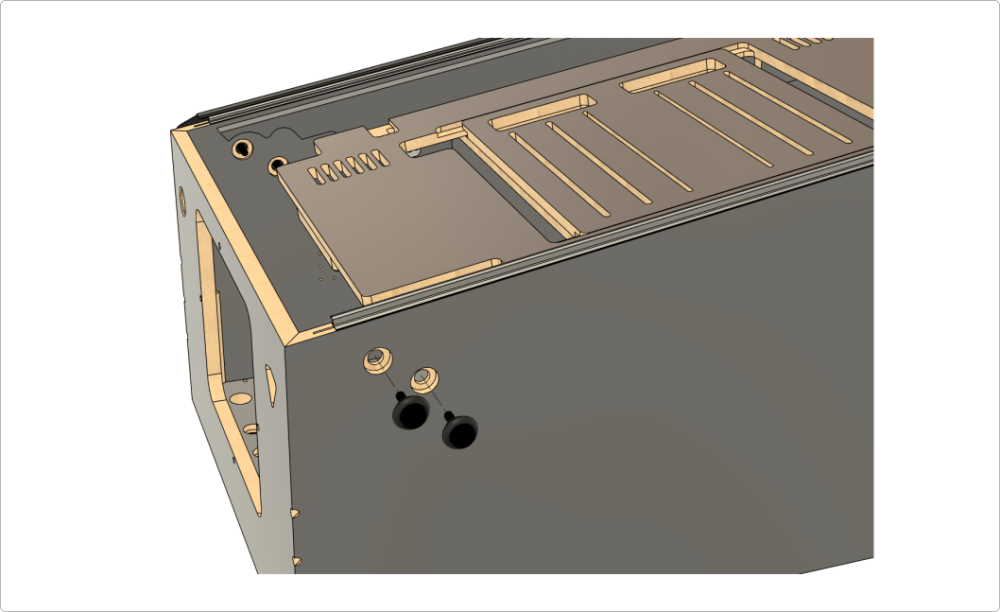
Before installing the TUKKARI siderails, it is highly recommended to install both the playfield glass plastic channels and the rear glass channel. It is also recommended to first install the flipper and magna-save buttons so that you can properly center the circular cutouts for the buttons on the siderails before attaching them with screws.These parts are not included in your kit and can be purchased from most pinball parts suppliers. Below, you’ll find example links to these items from the Germany-based shop pu-parts.com.
Playfield glass plastic channels (2 pcs): https://pu-parts.com/stern-extrusion-playfield-glass-side-channel-545-5017-00
Widebody rear glass plastic channel (1 pc): https://pu-parts.com/williams-bally-rear-black-plastic-playfield-glass-widebody-trim-03-8091-2
Cabinet flipper/magna-save buttons (4 pcs) - any color: https://pu-parts.com/cabinet-flipper-button-transparent-1-1-8-shaft-clear
Pal nut (4 pcs): https://pu-parts.com/nut-for-flipper-button

9. Sourcing other cabinet parts
The Tukkari VPin cabinet is compatible with most off-the-shelf pinball cabinet parts. In this downloadable PDF document, you will find a list of the most commonly used cabinet components for our widebody cabinet, including links to where you can purchase them.
The document contains a lot of super useful information, so we definitely recommend downloading it and checking it out.